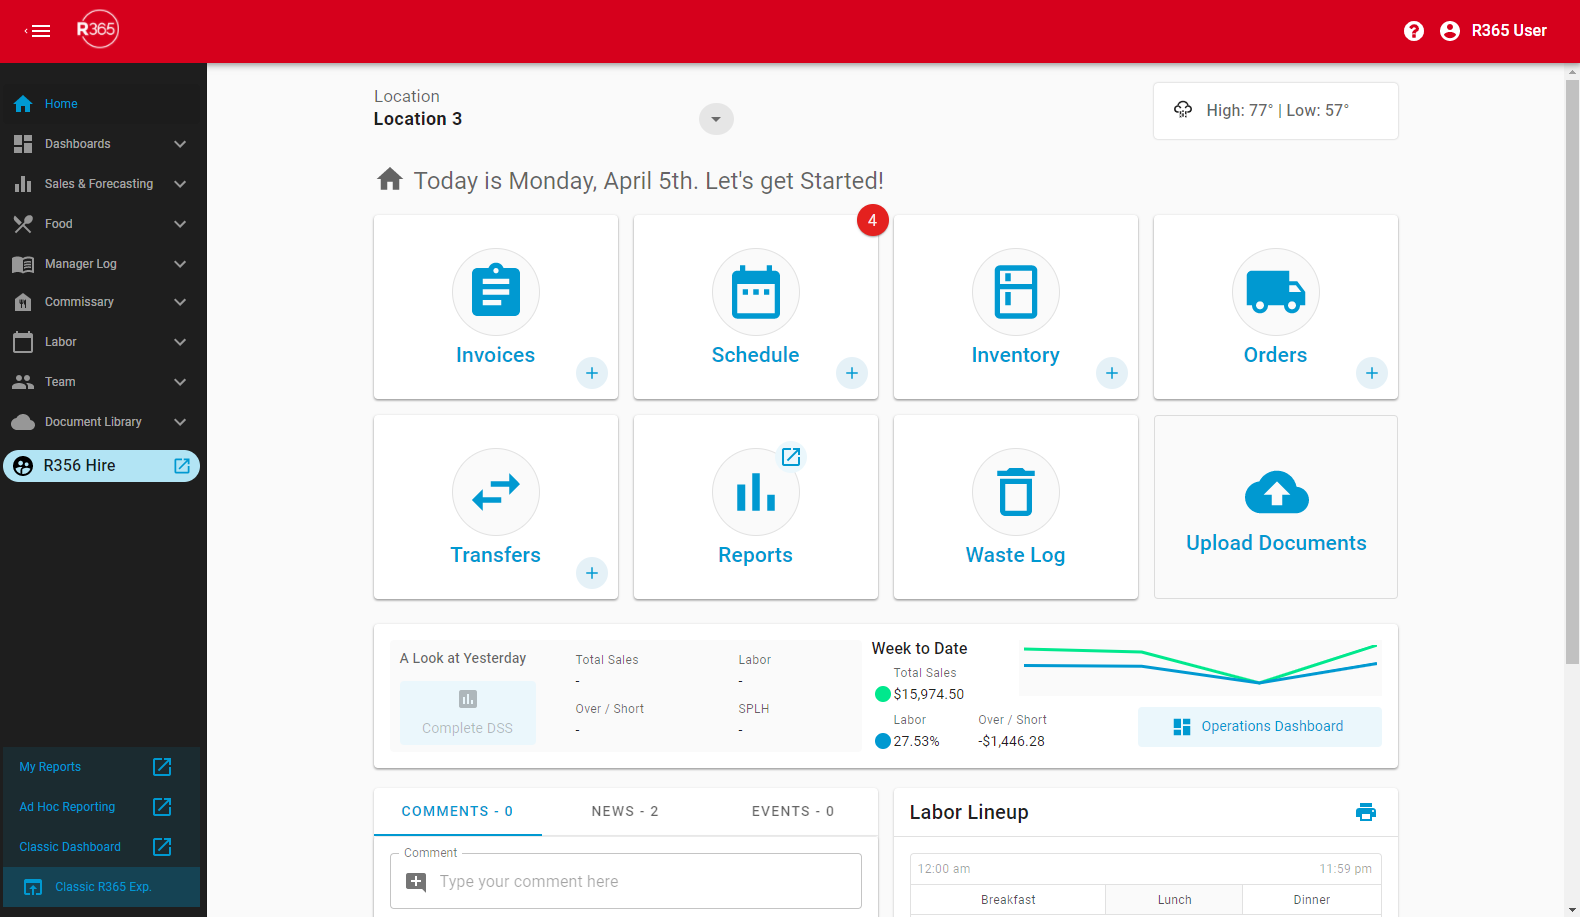
Smart Ops is designed with Restaurant Managers in mind. This advanced window both transforms POS data into bite-sized widgets and graphs for on-the-fly decision-making, and allows for transactions and records to be created easier and more efficiently than ever before through smart functionality and template use.
Further enhance this experience by adding Smart Labor to your plan. Once enabled, you can set up your organization's labor configuration through the Labor Matrix and build Hourly Forecasts to better predict daily Labor needs. Restaurant Managers will also be able to view additional Labor Metrics on both the Operations Dashboard and Labor Dashboard to make data-driven staffing decisions. These can even be made in real-time if Intraday Polling is enabled.
The Smart Ops Home page displays various parts of this experience and take a glance at valuable Sales and Labor details. Users will be automatically directed to the Home page upon logging into the system if their User Role(s) contain one following Permissions:
Sales & Cash → Daily Sales → View Daily Sales Summary
Labor → Scheduling → Schedule → View Schedule
Food → Recipes → View Recipes
Printable Guides
The following are downloadable guides that can be printed and displayed in your restaurant's back office:
Security
Each Smart Ops feature includes a listing of the Permissions needed to access a page and complete certain functions. Review each feature's overview article to ensure that the necessary Users have access to Smart Ops.
Learn more about managing Permissions and Custom User Roles here. The Permission Access report can be used to determine which User Roles or User Record already have these Permissions assigned. Learn more about User Setup and Security here.
Navigation
Users can open Smart Ops by clicking 'Smart Operations' in the Classic Experience module selector. This will open the Smart Ops window. From the left navigation bar, Users can navigate to the corresponding areas of the system.
Users will be automatically directed to the Home page upon logging into the system if their User Role(s) contain one following Permissions:
Sales & Cash → Daily Sales → View Daily Sales Summary
Labor → Scheduling → Schedule → View Schedule
Food → Recipes → View Recipes
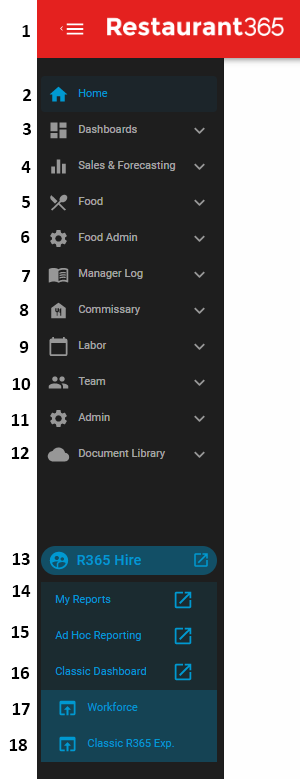
Left Pane Collapse Button - This will collapse the pane
Home Page - This will open the Home page
Dashboards - When clicked, this will display links to the following pages:
Sales & Forecasting - When clicked, this will display links to the following pages:
This will only be displayed if Till Management is enabled for your database
Sales Tickets
Food - When clicked, this will display links to the following pages:
Food Admin - When clicked, this will display links to the following pages:
This is the Classic Items page. The Smart Ops Items page is found in the 'Food' category (#5)
Manager Log - When clicked, this will display links to the following pages:
Commissary - This will only be displayed if Commissary is enabled for your database. When clicked, this will display links to the following pages:
Labor - When clicked, this will display links to the following pages:
Team - When clicked, this will display links to the following pages:
This is the Classic Employees page. For the Smart Ops page, use the 'Employees' option that is not appended with '(classic)'
Admin - When clicked, this will display links to the following pages:
Preferences - This will open the 'System Preferences' page in a new tab
Repoll DSS - This will open the 'Repoll DSS' page in a new tab
Import - This will open the 'Import Tool' in a new tab
Document Library - This will open Documents to Process
R365 Hire - This will open to the R365 Hire login screen, if enabled
My Reports - This will open My Reports in a new tab
Ad Hoc Reporting - This will open Ad Hoc Reporting in a new tab, if enabled
Classic Dashboard - This will open the Ad Hoc Dashboard in a new tab, if enabled
Workforce - This will open R365 Payroll in a new tab, if enabled
Classic R365 Exp. - This will the Classic R365 Experience in a new tab