The Item Categories page lists all the Items and their Item Categories. Learn more about Item Categories.
Navigation
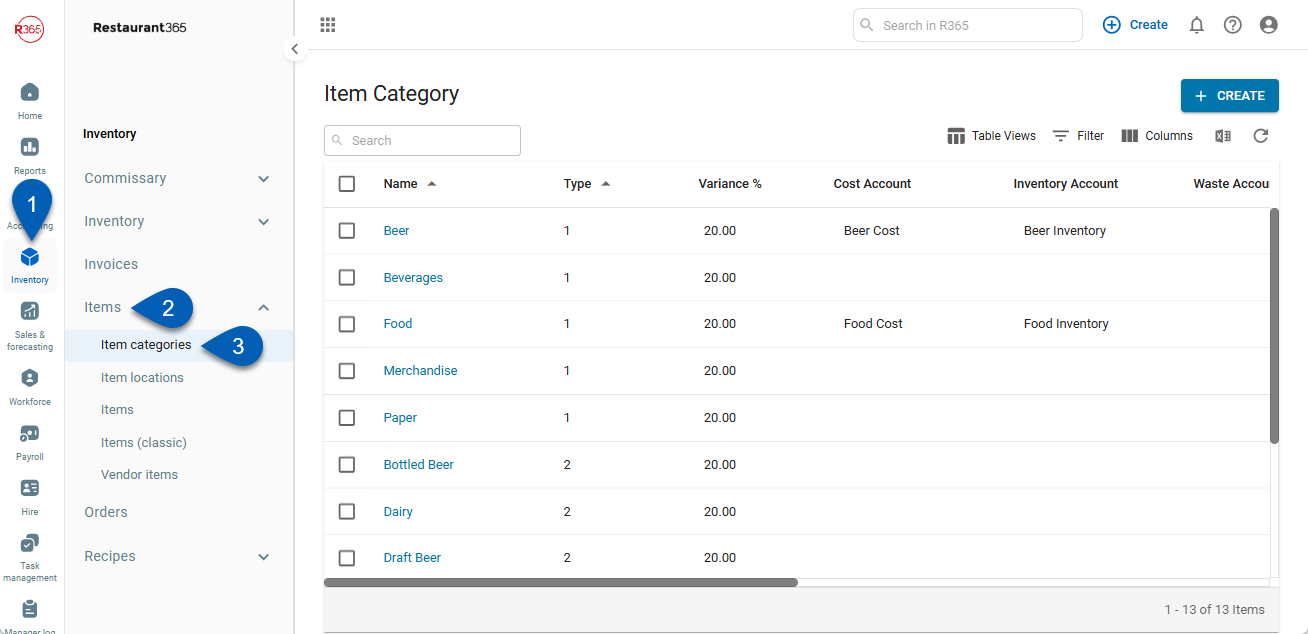
Navigation Steps
Open the Inventory app.
Expand Items.
Select Item categories.
Search
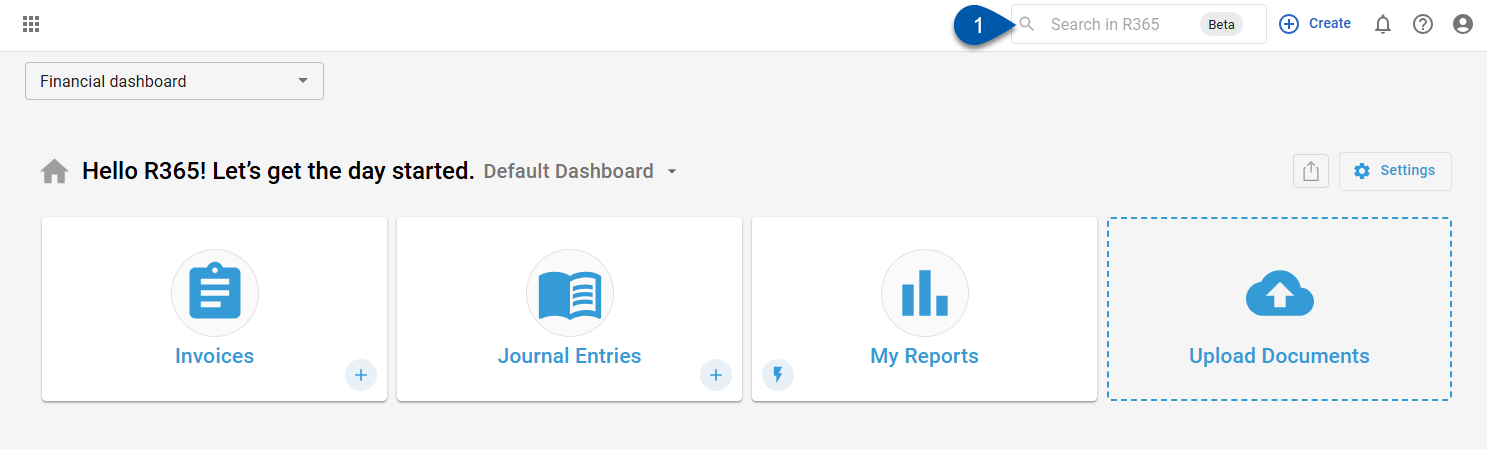
Navigate to pages with the R365 global search bar:
Enter all or part of the page name in the R365 global search bar.
Select the page from the results list.
Only enabled pages can be searched for. If the desired page is not enabled, contact your CSM for assistance.
Item Category Grid
Field | Description | ||||||||||||||||
|---|---|---|---|---|---|---|---|---|---|---|---|---|---|---|---|---|---|
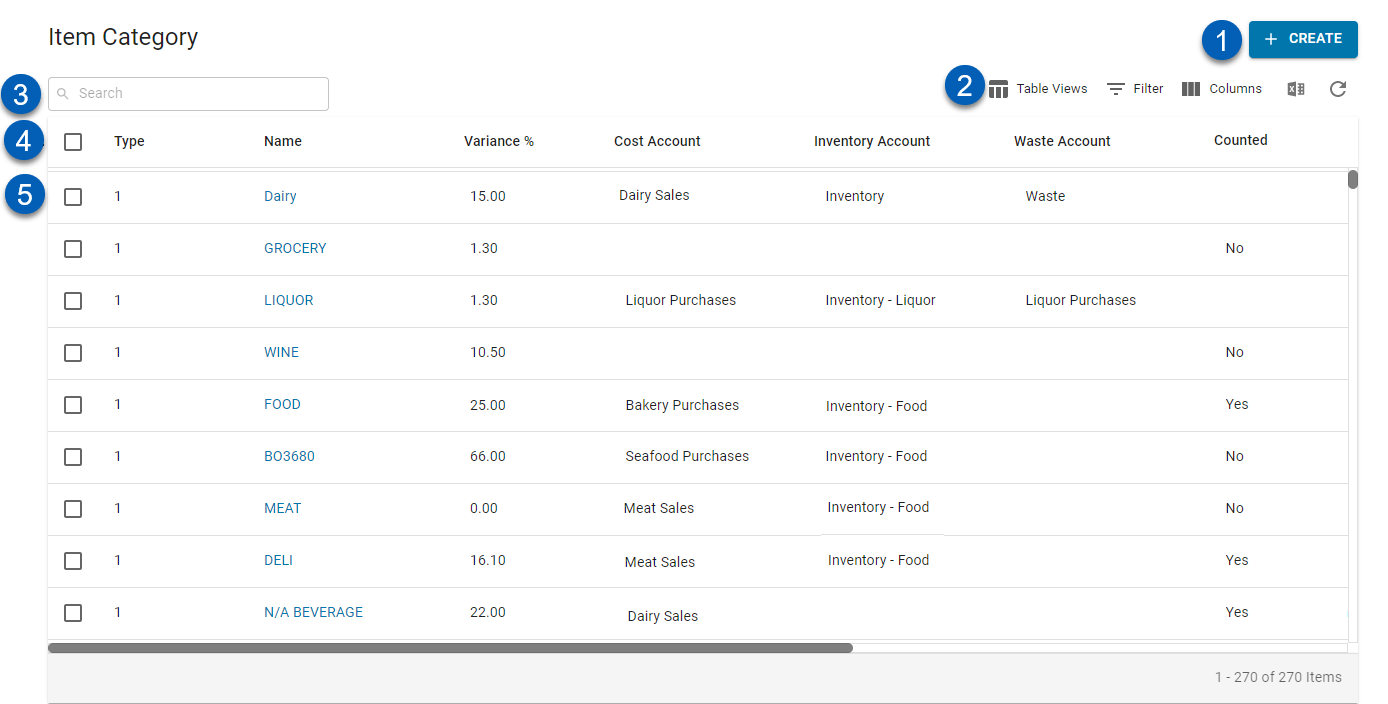
1 | Create | Creates a new item category record. When clicked, a dropdown with Item Category 1, 2, and 3 options will appear. | |||||||||||||||
2 | Table View Actions | The table actions include the following:
| |||||||||||||||
3 | Search | Use keywords to search for a specific item category. | |||||||||||||||
4 | Column Headers | The name of the columns. From the column header, users can do the following:
| |||||||||||||||
5 | Item Category Entry | The item category listing with all the information selected for display in the column views. Click an item category name to open an existing item category form. |


 .
.Table Columns
Field | Description |
|---|---|
Type | The type of item category: Item Category 1, 2, or 3. |
Name | The name of the item category. |
Variance % (Purchasing) | The set positive variance threshold allowed for this item category within Purchasing. This is the acceptable percent cost increase that is allowed for items within the item category. Threshold violations for this Variance % appear on the AP invoice. When the cost of an item increases, and the cost increase exceeds this set variance, a threshold violation notice will appear. Read more about the purchasing Variance % threshold. This field can be edited in the grid by clicking the variance % number and entering a new value. |
Cost Account | The COGS account that will be assigned to this item category. This account can be changed in the grid by clicking the account name to open the account selector. When Accounting is ON, users can also remove this account by clicking the icon. |
Inventory Account | The inventory account that accounts for this item category. This account can be changed in the grid by clicking the account name to open the account selector. When Accounting is ON, users can also remove this account by clicking the icon. |
Waste Account | The GL Account that's debited when a waste log is entered. This account can be changed or removed (by clicking the icon) in the grid by clicking the account name to open the account selector. |
Donations Account | The GL account that's debited when a donation log is entered. This account can be changed or removed (by clicking the icon) in the grid by clicking the account name to open the account selector. |
Counted | Whether the item category is counted in inventory. This setting can be changed in the grid by clicking the space or existing answer to open the selector. |
Item Prefix | The prefix assigned to the item category. This field can be edited in the grid by clicking the space or existing prefix and typing in a new prefix. |
Actual as Theoretical | Whether this item category uses actual usage in place of the theoretical usage on the AvT report. This field can be edited in the grid by clicking the space or existing answer to open the selector. |
Inventory Variance % | The acceptable inventory variance percent. This variance percent pertains to inventory quantity, and when an item count exceeds this variance, the theoretical flag will appear on the Variance Review tab. Read more about inventory count variances. |
Brand | The specific brand associated with the item category, if any. Additional information can be added or removed from the table by changing the 'Columns' settings or rearranged by dragging and dropping the column headers. |