When processing invoices, credit memos, or draft transactions, it's common to encounter items that have not yet been associated with existing products or services in your Restaurant365 database. Linking these unlinked items connects the billed items and items in the restaurant's inventory, ensuring that records reflect expenditures.
When unlinked items exist on an uploaded invoice or credit memo, users can access the Link items window directly from the invoice and link the vendor item to an item in R365. If the item does not match an existing item in the database, a new item can be created from this form.
The Link items window is available in both the Accounting app and in the Inventory app:
Accounting App
This is for the classic Draft Transaction experience. Learn about linking unlinked items in the New Draft Transaction experience.
Inventory App
Security
To use the Link items sheet in the Accounting module, users must have the following permission:
Accounts Payable → AP Invoices → Assign Missing Items
To use the Link Items sheet in the Inventory app, users must have either/both of the following permissions:
Food → AP Invoices → Assign Missing Items
Food → AP Credit Memos → Assign Missing Items
Navigation
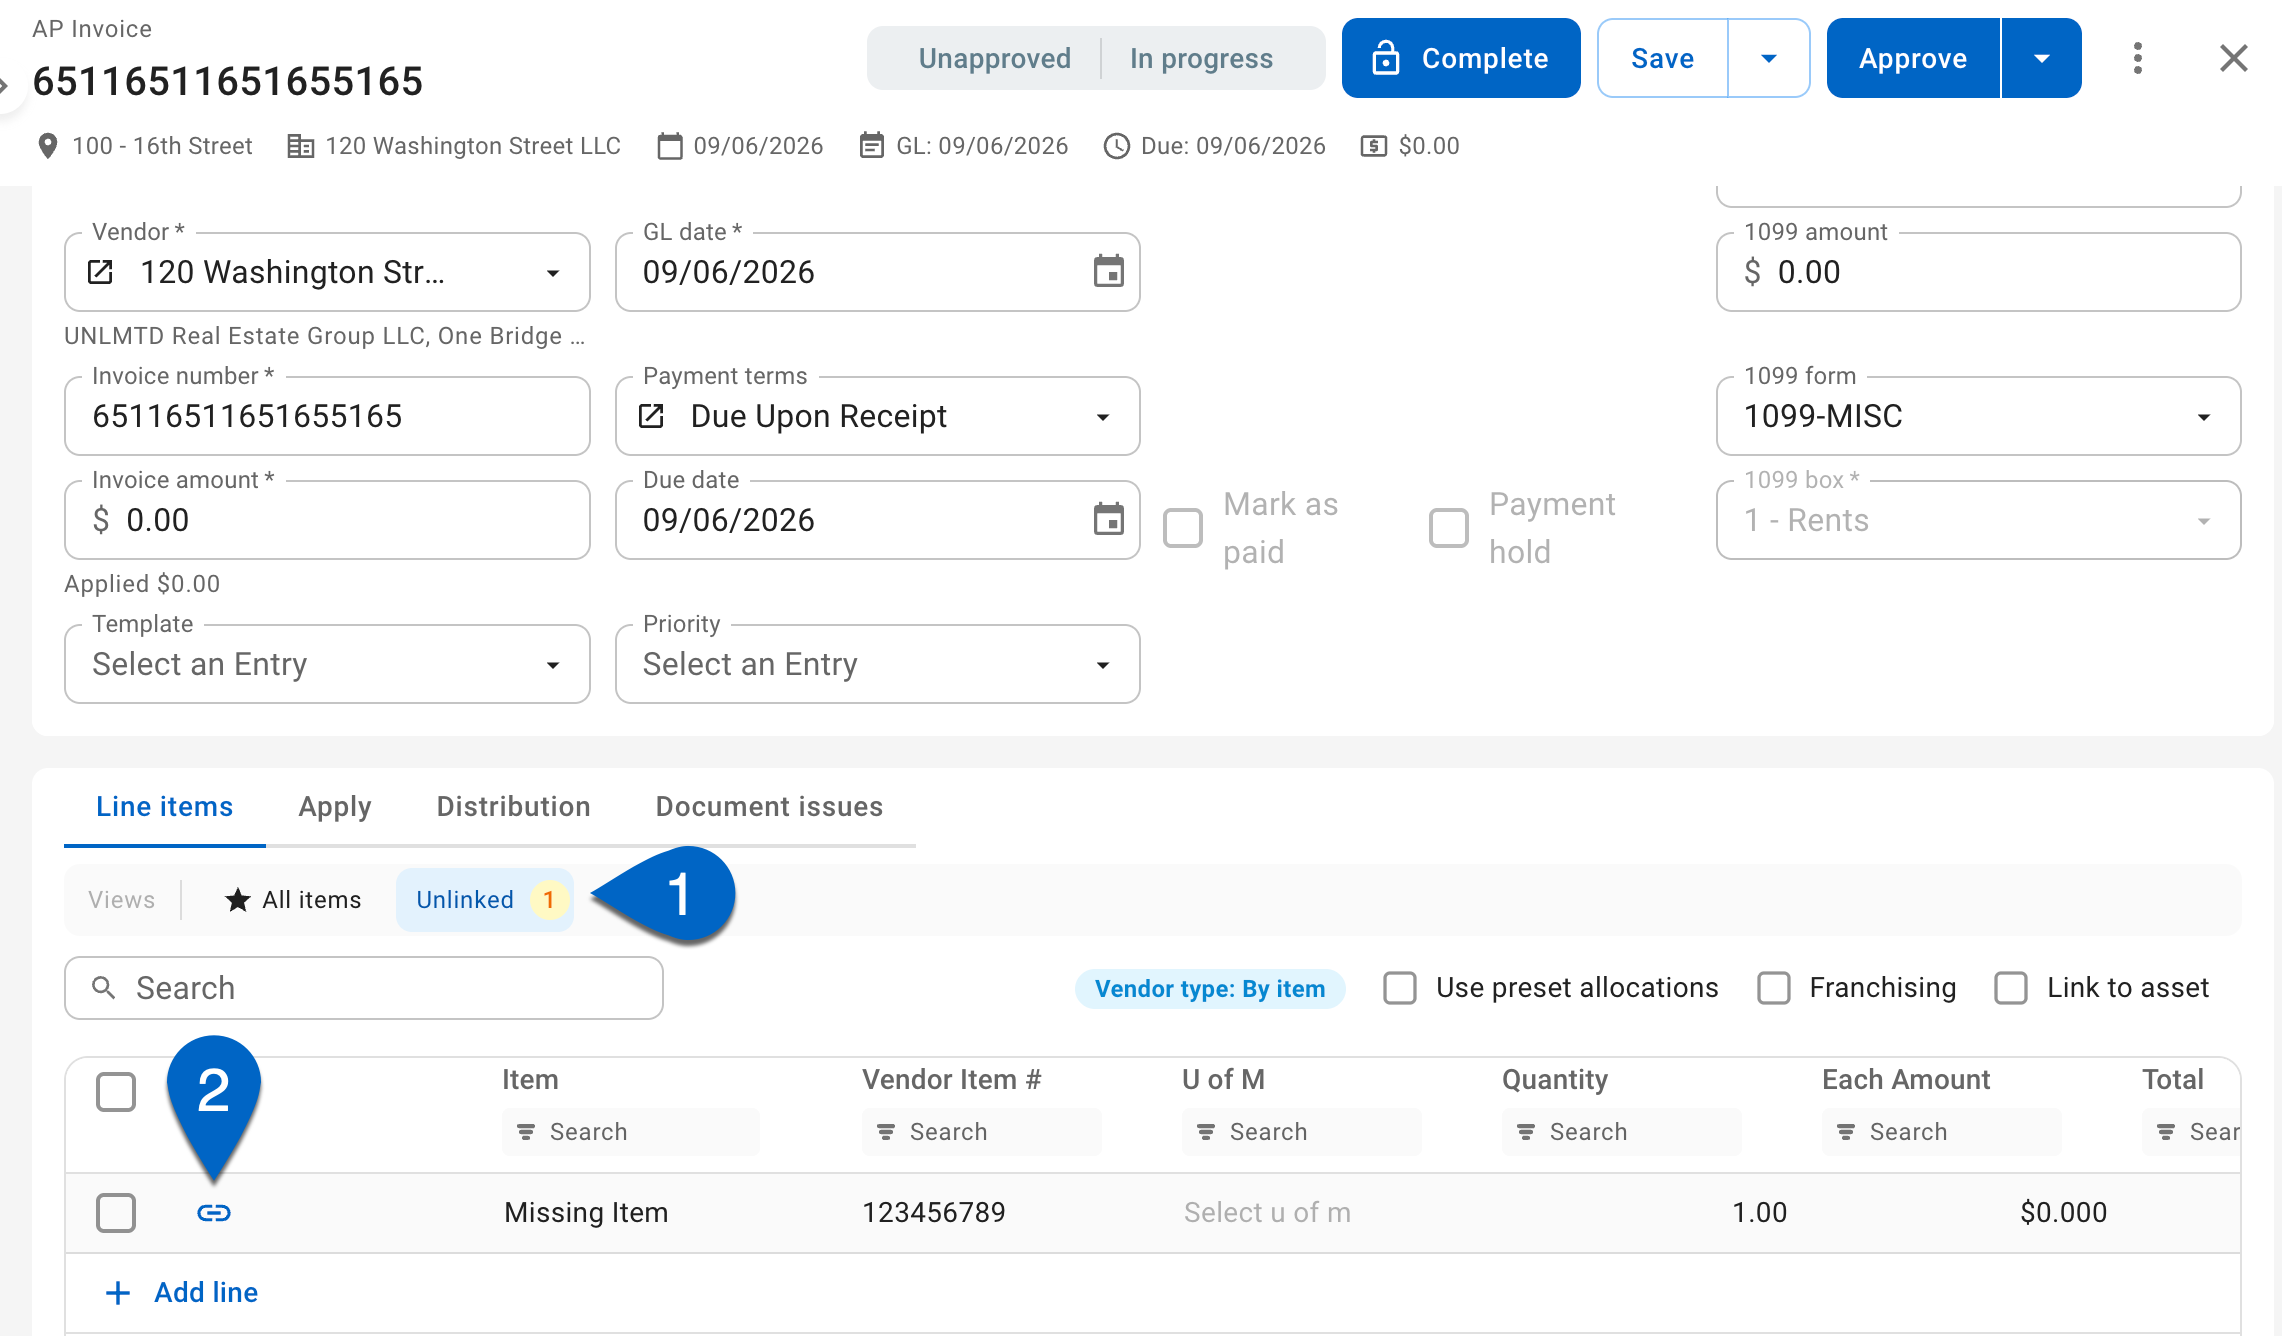
When there are unlinked items on an invoice or credit memo, the Unlinked view will appear as a pre-set view on the Line items tab.
To open the Link items window:
Select the Unlinked view.
Click an Assign Item button to open the Link item window.
Link Item Window
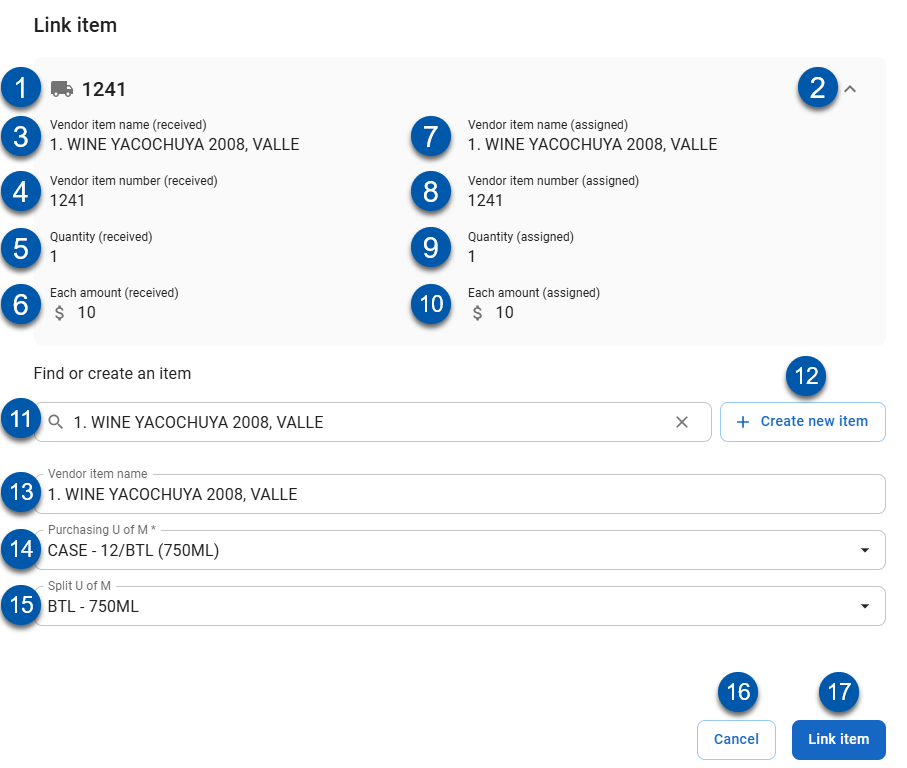
From the Link Items window, users can search and link an existing item or create a new item. The linked item details appear are displayed in the collapsible header section.
Field | Description | |
|---|---|---|
1 | Vendor Item | The vendor delivery being reviewed, identified by the vendor item number (e.g., 1241). |
2 | Expand/collapse | Toggles the header details open or closed. |
3 | Vendor item name (received) | The item name as it appears on the vendor's delivery. |
4 | Vendor item number (received) | The item number as it appears on the vendor's delivery. |
5 | Quantity (received) | The quantity included in the vendor's delivery. |
6 | Each amount (received) | The unit cost as reported on the vendor's delivery. |
7 | Vendor item name (assigned) | The item name assigned in R365, matched to the delivery. |
8 | Vendor item number (assigned) | The item number assigned in R365, matched to the delivery. |
9 | Quantity (assigned) | The quantity recorded in R365 for this delivery line. |
10 | Each amount (assigned) | The unit cost recorded in R365 for this delivery line. |
11 | Search field | Search for an existing item in R365 by name or number to link to this delivery line. Learn more about linking existing items below. |
12 | Vendor item name | The item name as it appears on the vendor's delivery. Can be edited. |
13 | Purchasing U of M | The unit of measure used when purchasing this item from the vendor. Required. |
14 | Split U of M | The unit of measure used to split the purchased quantity into smaller units for inventory. Optional. |
15 | Create new item | Opens the Create and link item panel to add a new item to R365 and link it to this delivery line at the same time. Learn more about creating new items below. |
16 | Cancel | Closes the Link item panel without saving changes. |
17 | Link item | Saves the item link and applies it to the delivery line. |
Linking an Existing Item
To link a purchased item to the unlinked vendor item:
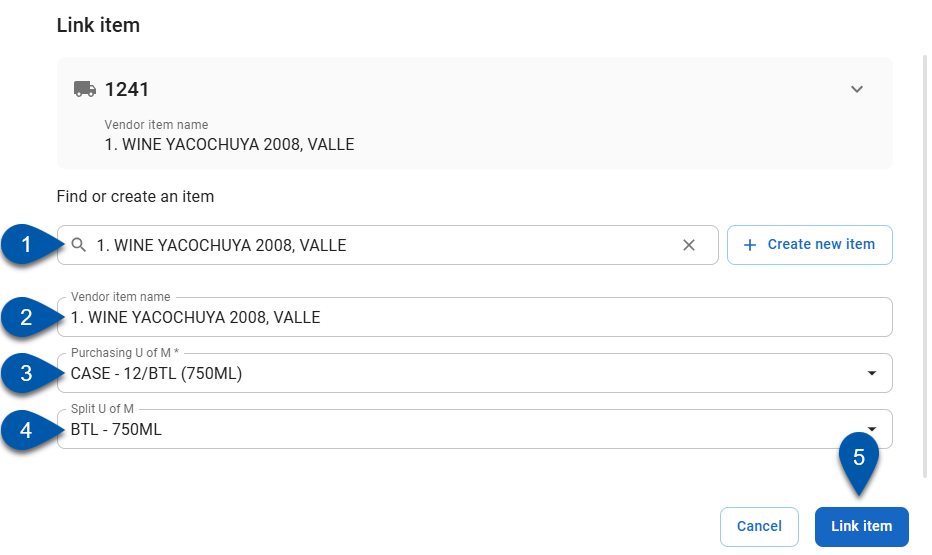
Click the item selector, and select the correct item.
Edit the Vendor item name, if needed.
Select the Purchasing U of M to use for the item. The recommended unit of measure will show at the top of the list.
Optional: Select the Split U of M to use for the item.
Click Link item.
Creating a New Item From the Link Items window
In the case that the proper purchased item does not yet exist in the system, create a new purchased item from the Link Item window. To create a new purchased item, follow these steps:
Click steps to expand for additional information and images.
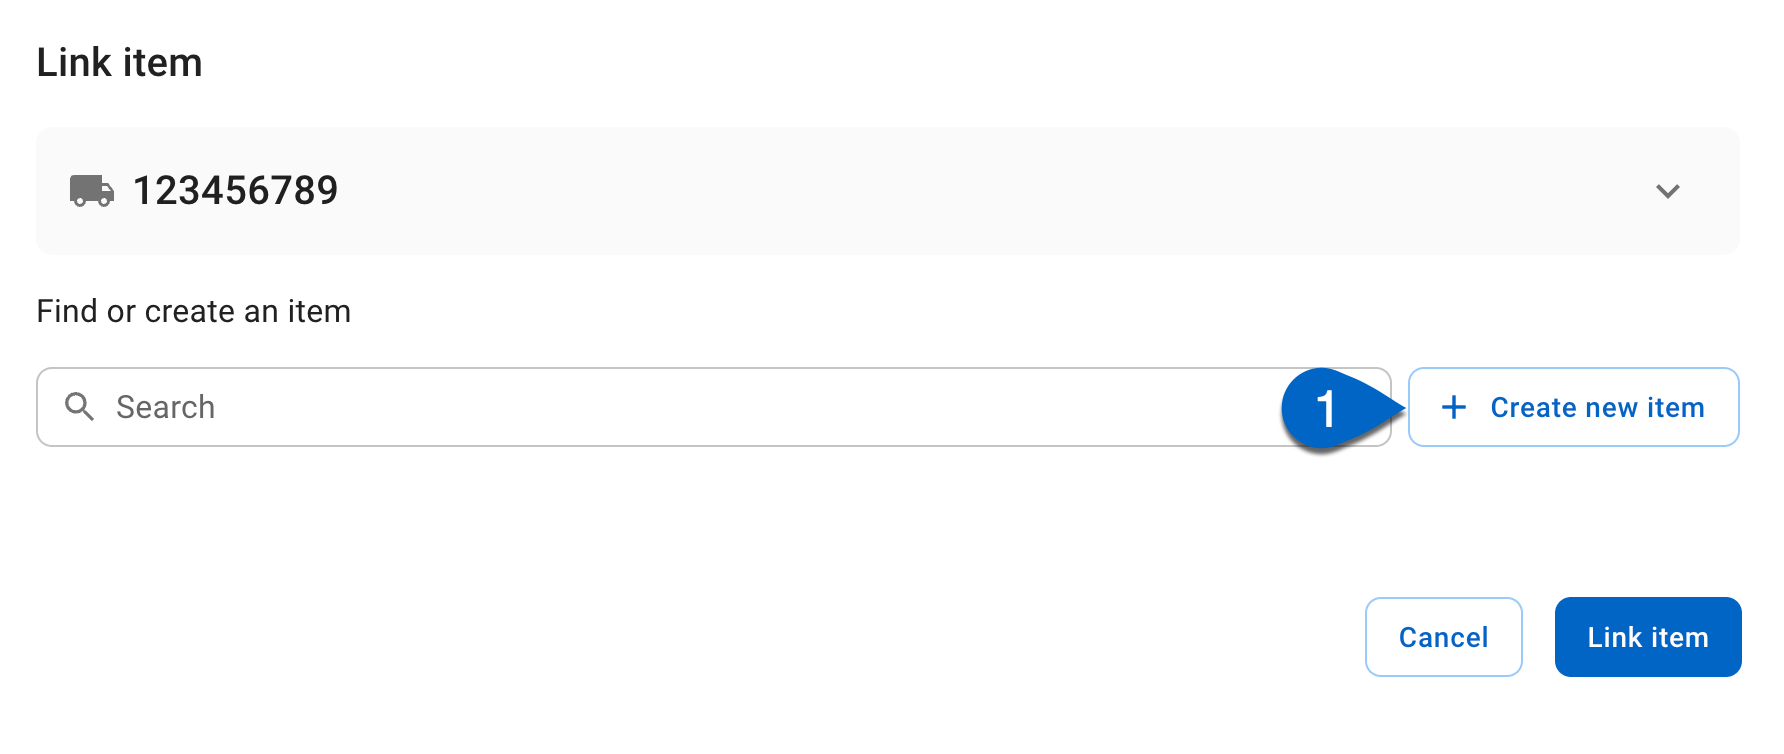
1) Click Create New Item.
2) Enter a Name for the item.
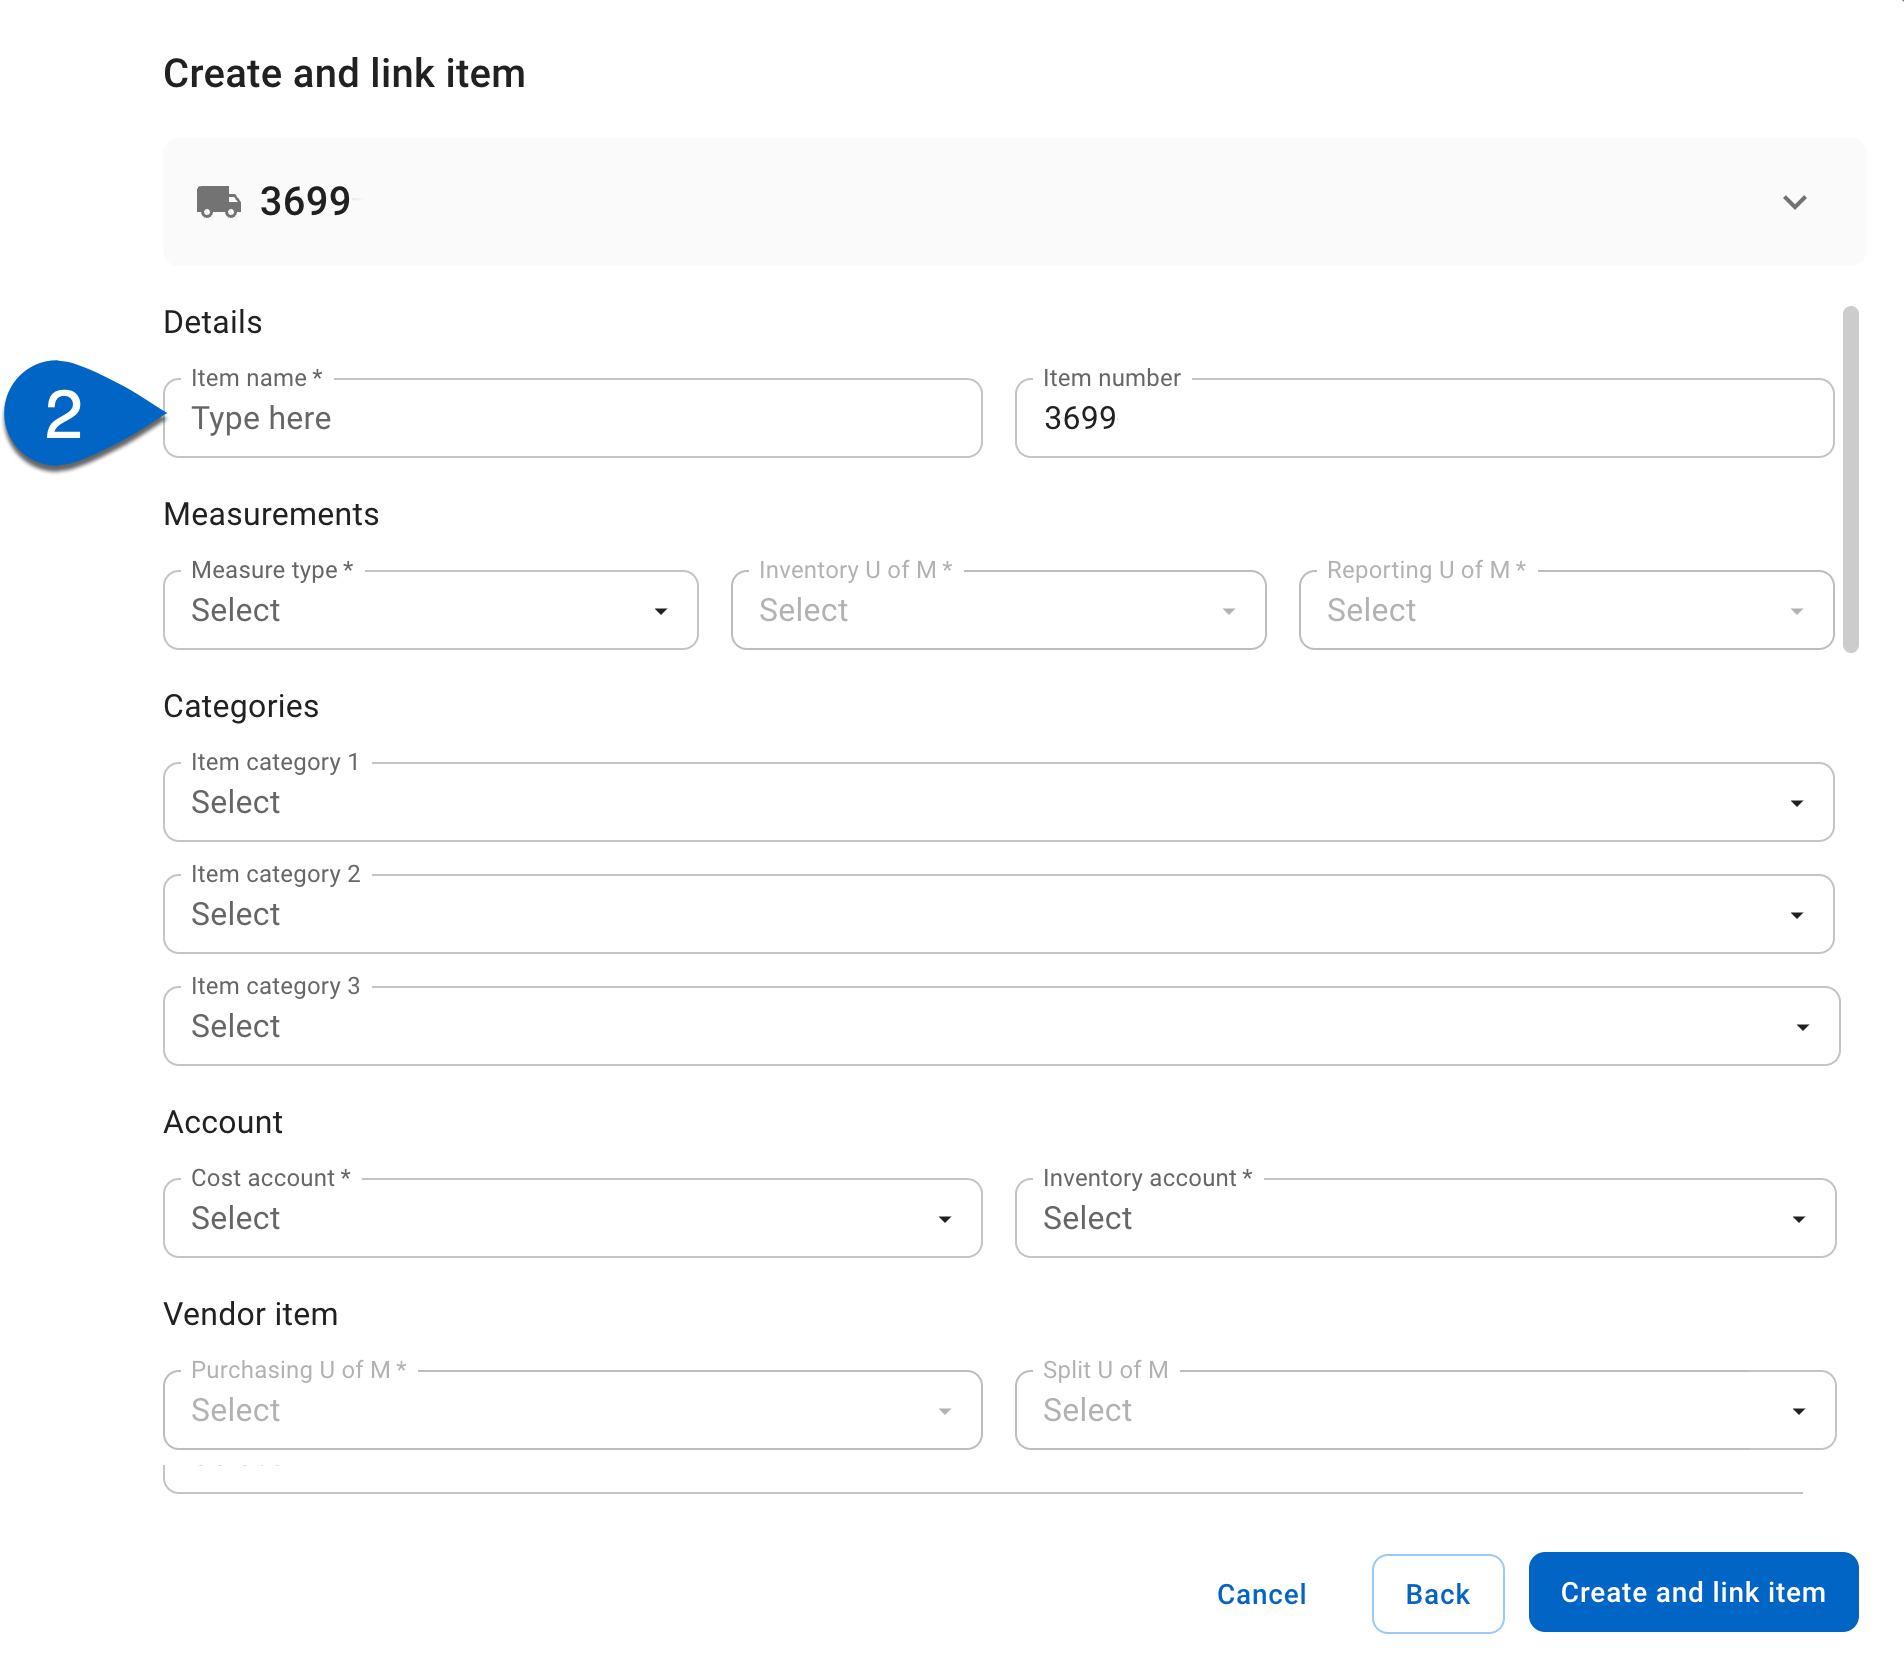
Optionally, assign an Item number in this section.
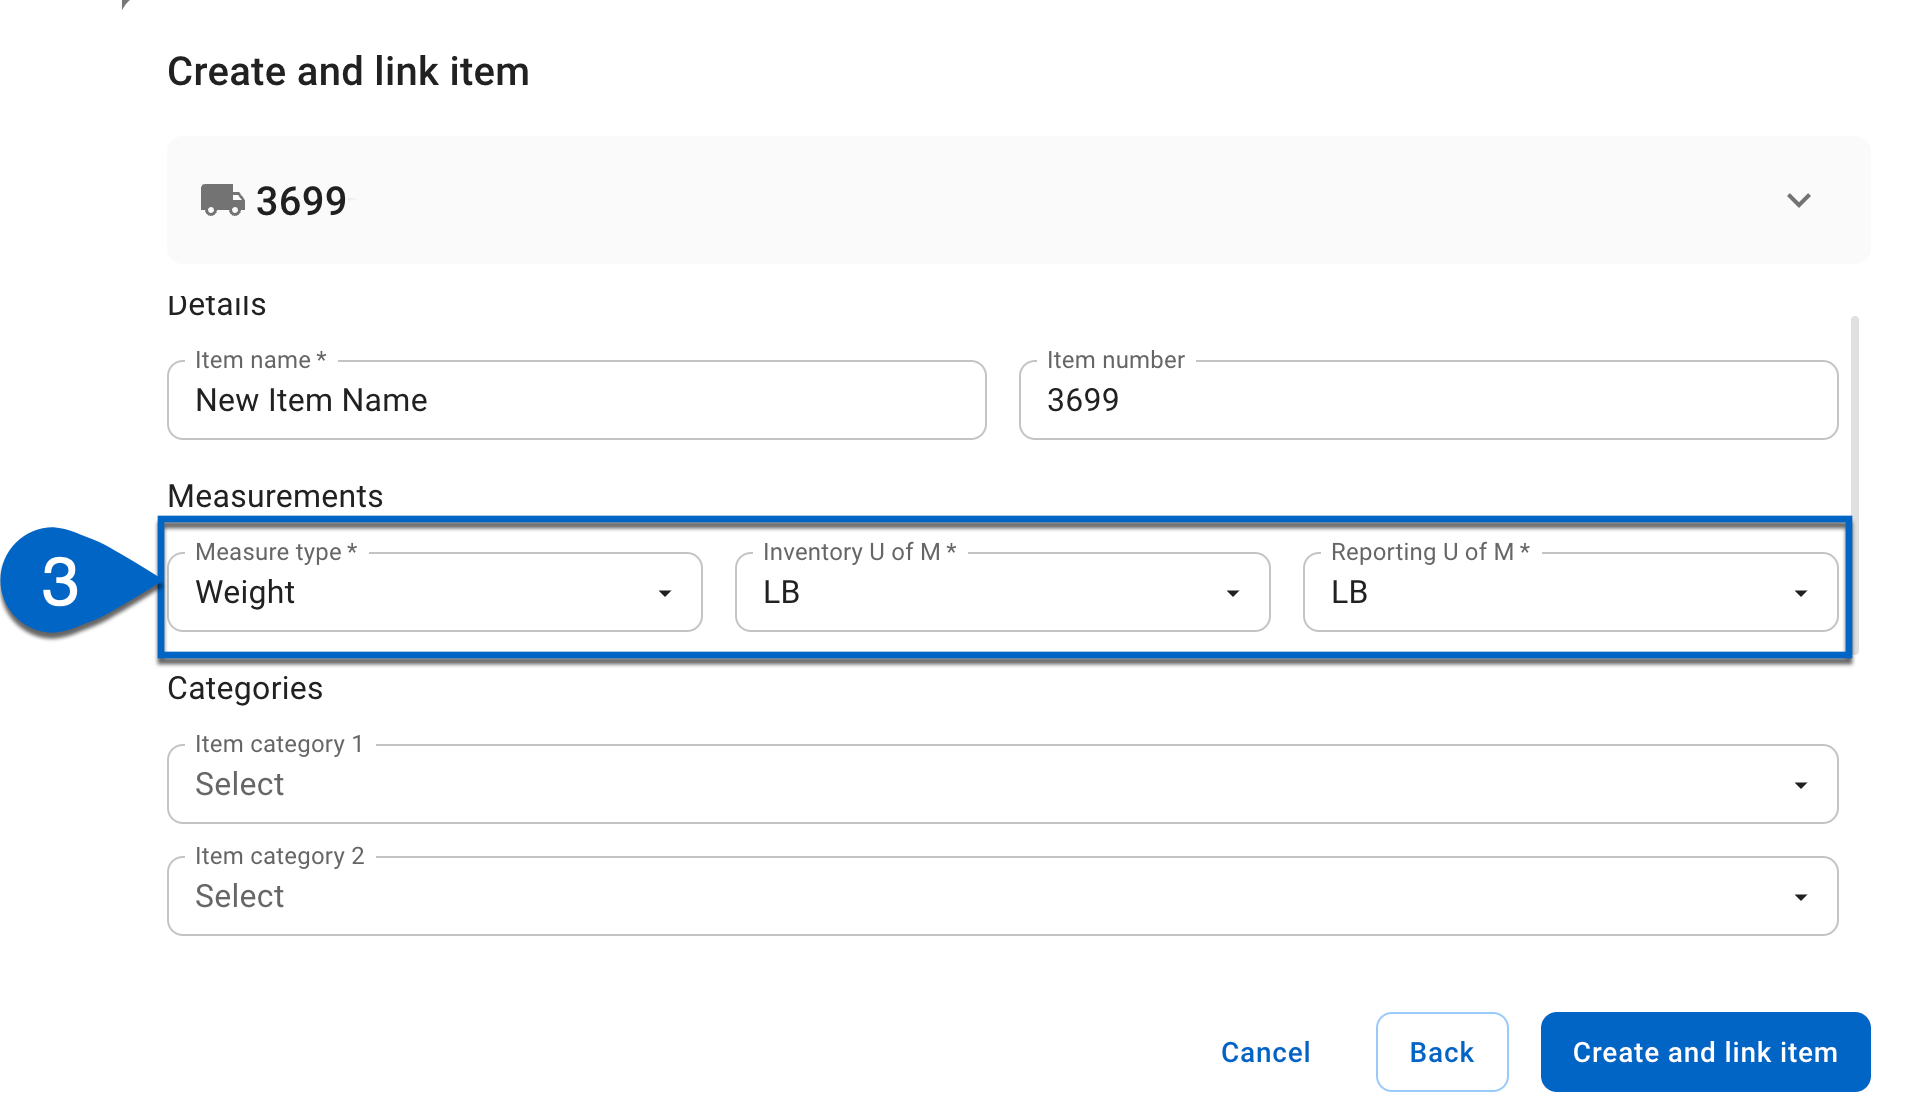
3) Assign the measurements including the Measure Type, Inventory UofM, and Reporting UofM.
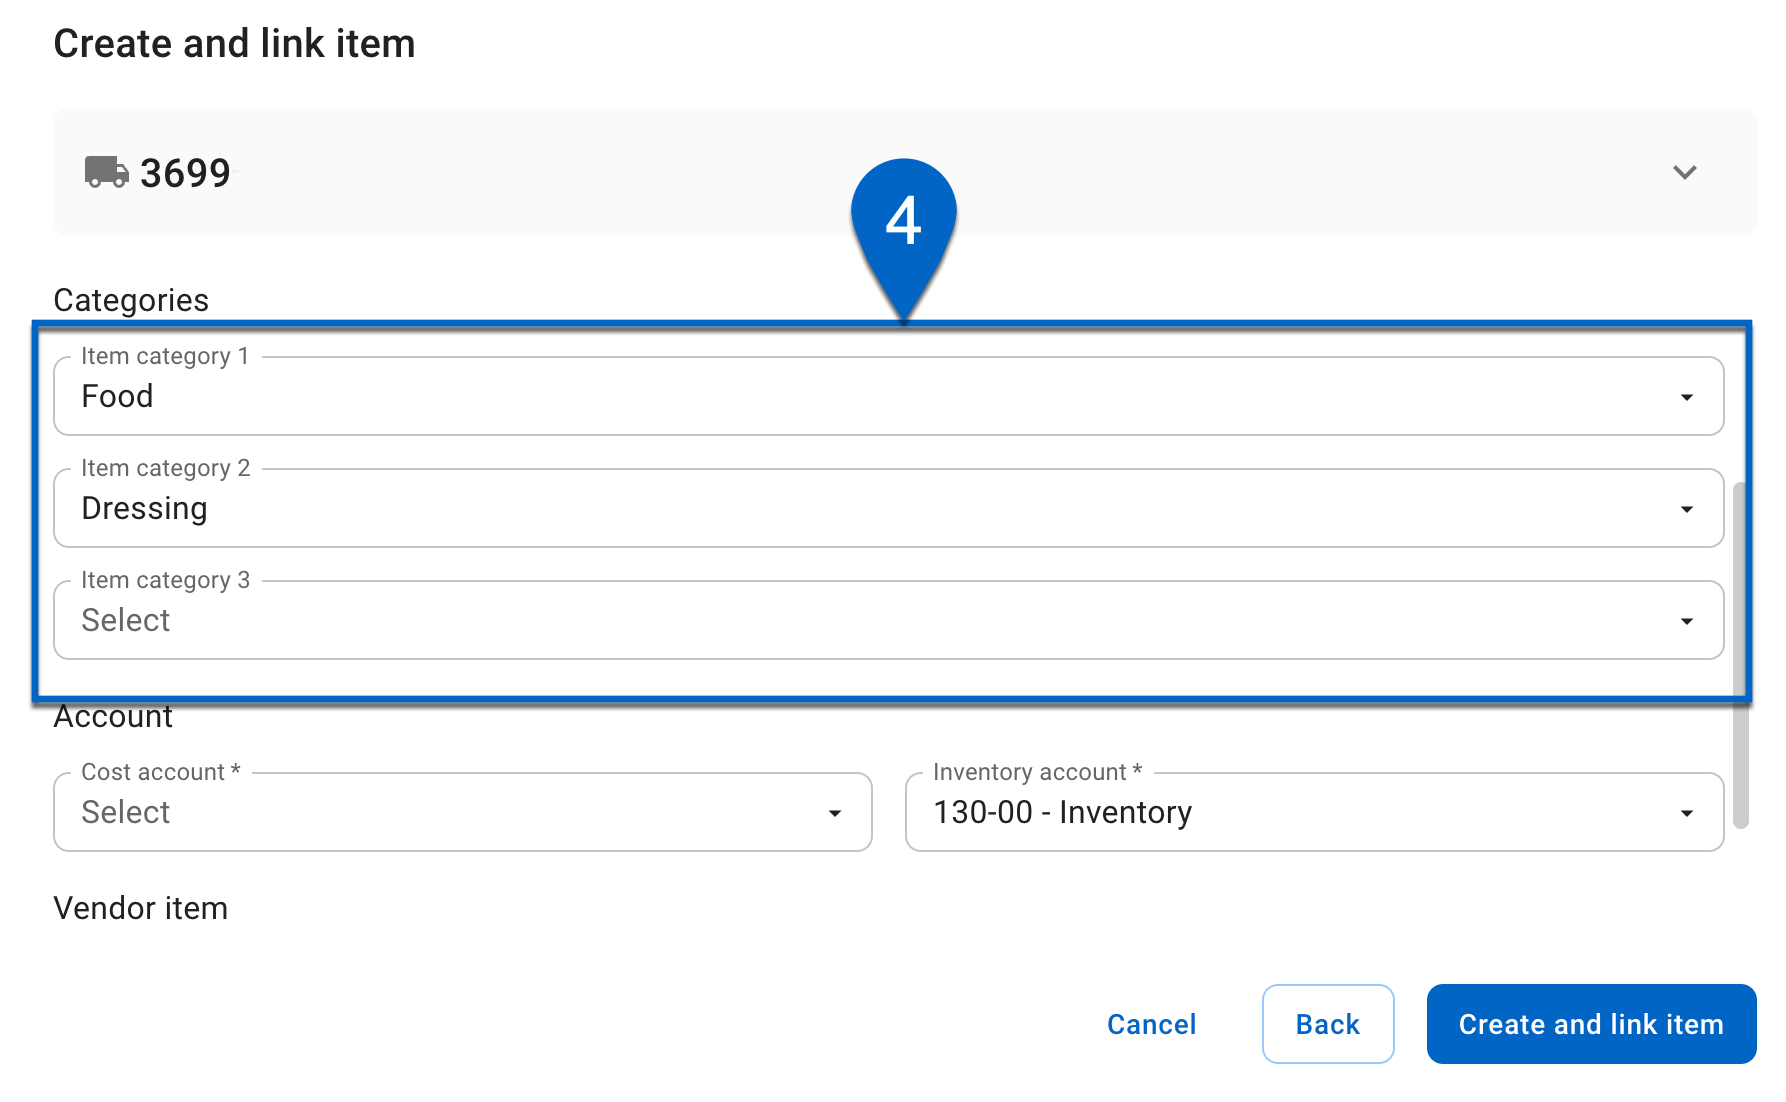
4) Optional: Assign the item to one or all three Item Categories.
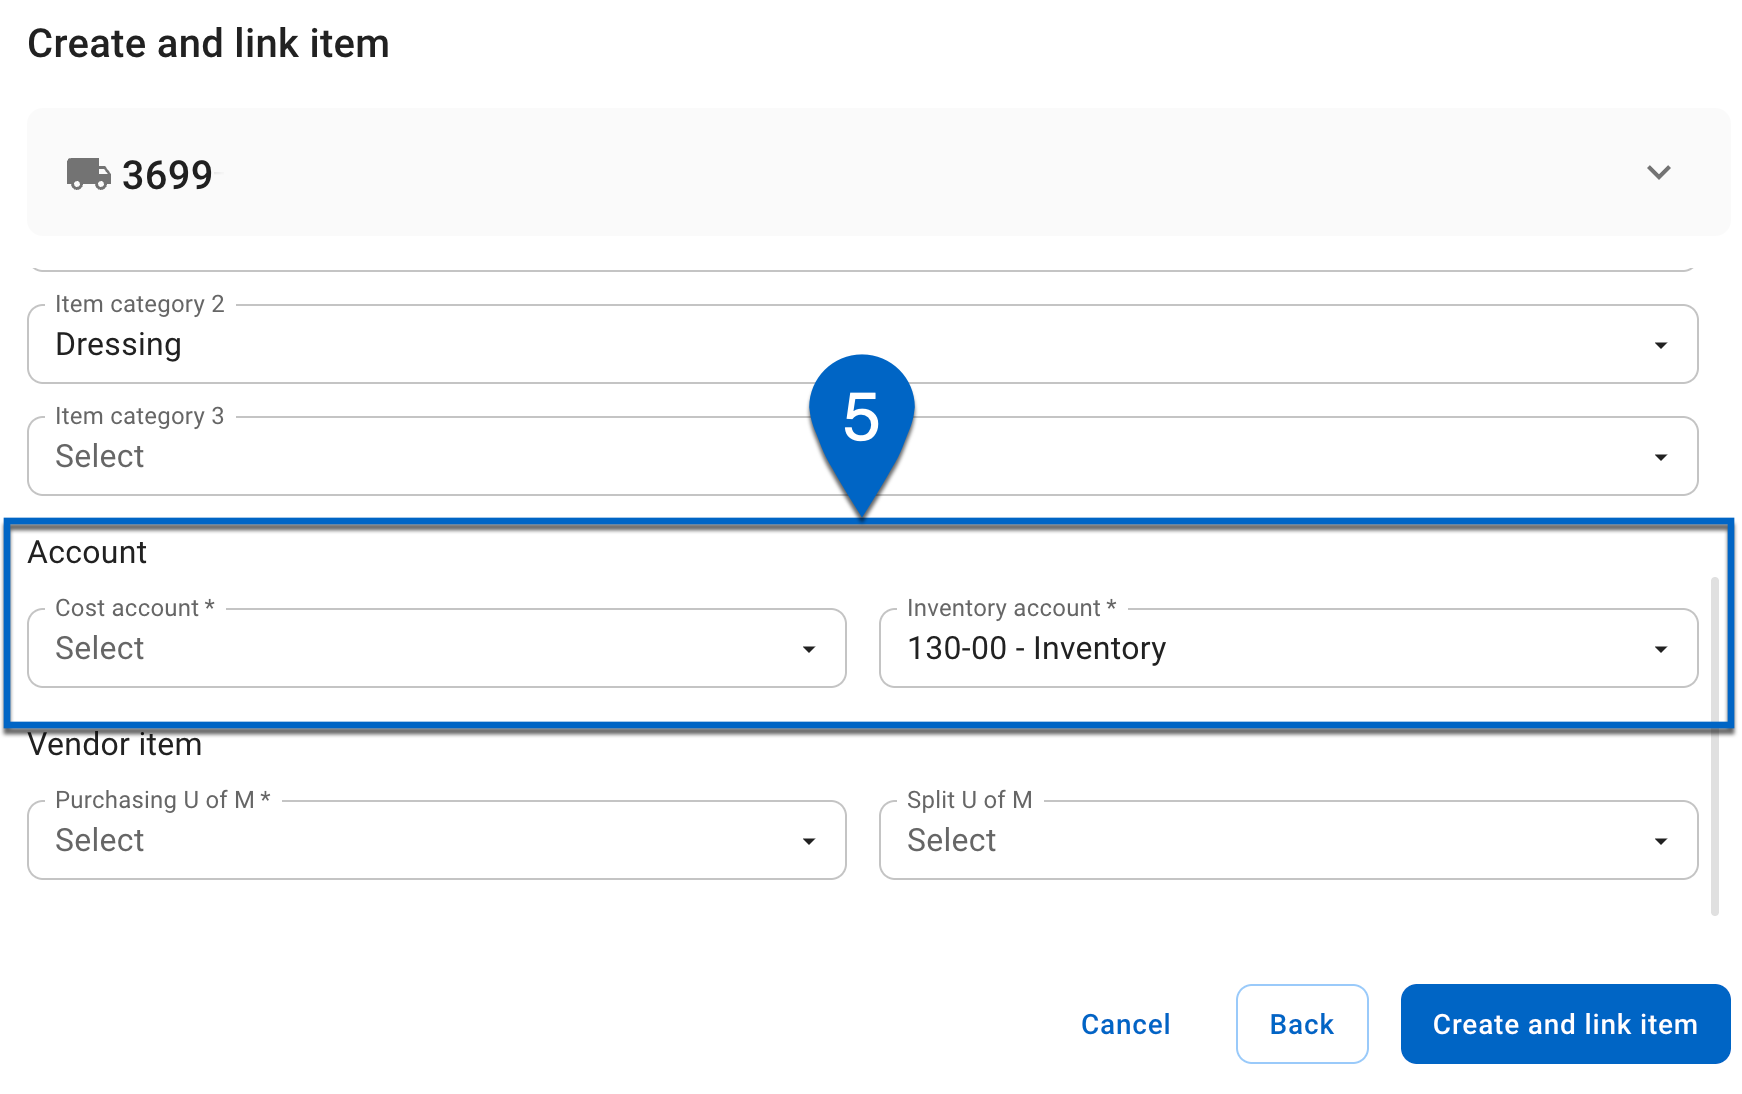
5) Select a Cost Account and Inventory Account.
When an item category with an assigned cost and inventory account is selected, these fields will autofill.
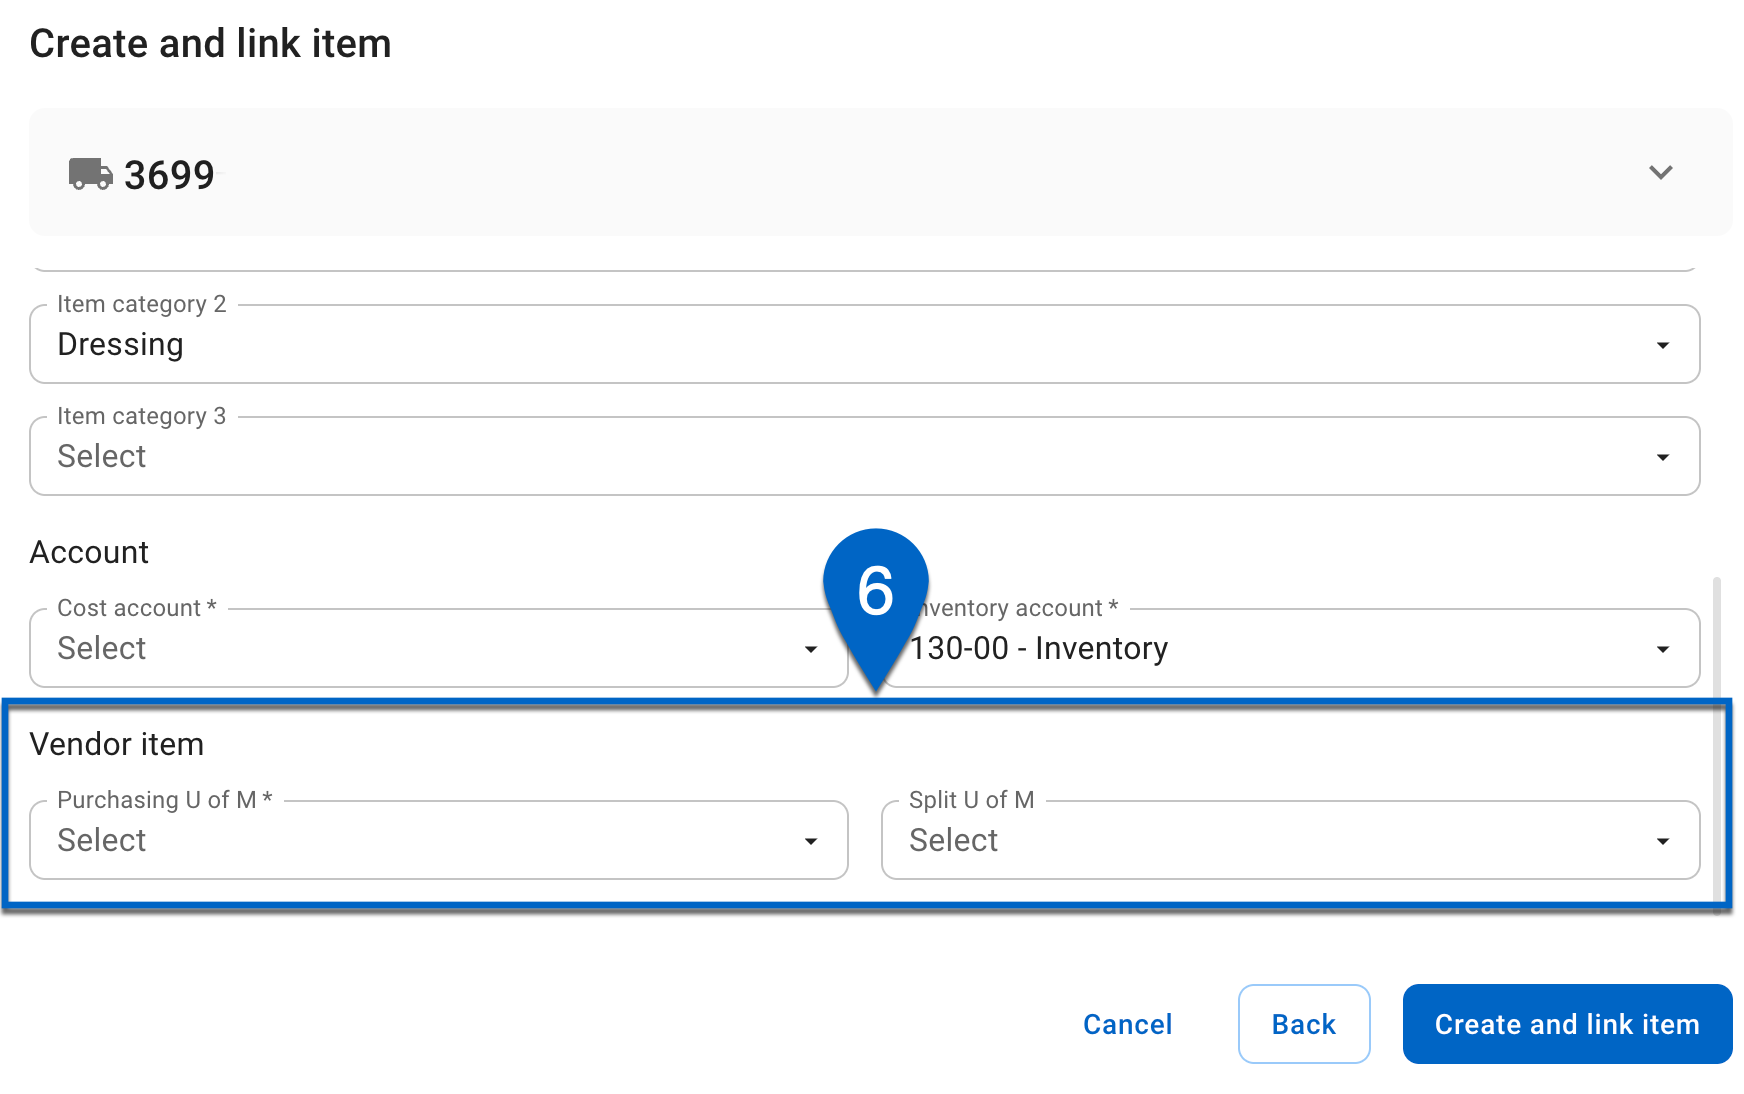
6) Select a Purchasing UofM.
Optionally, add a Split UofM.
7) Click Create and Link Item.
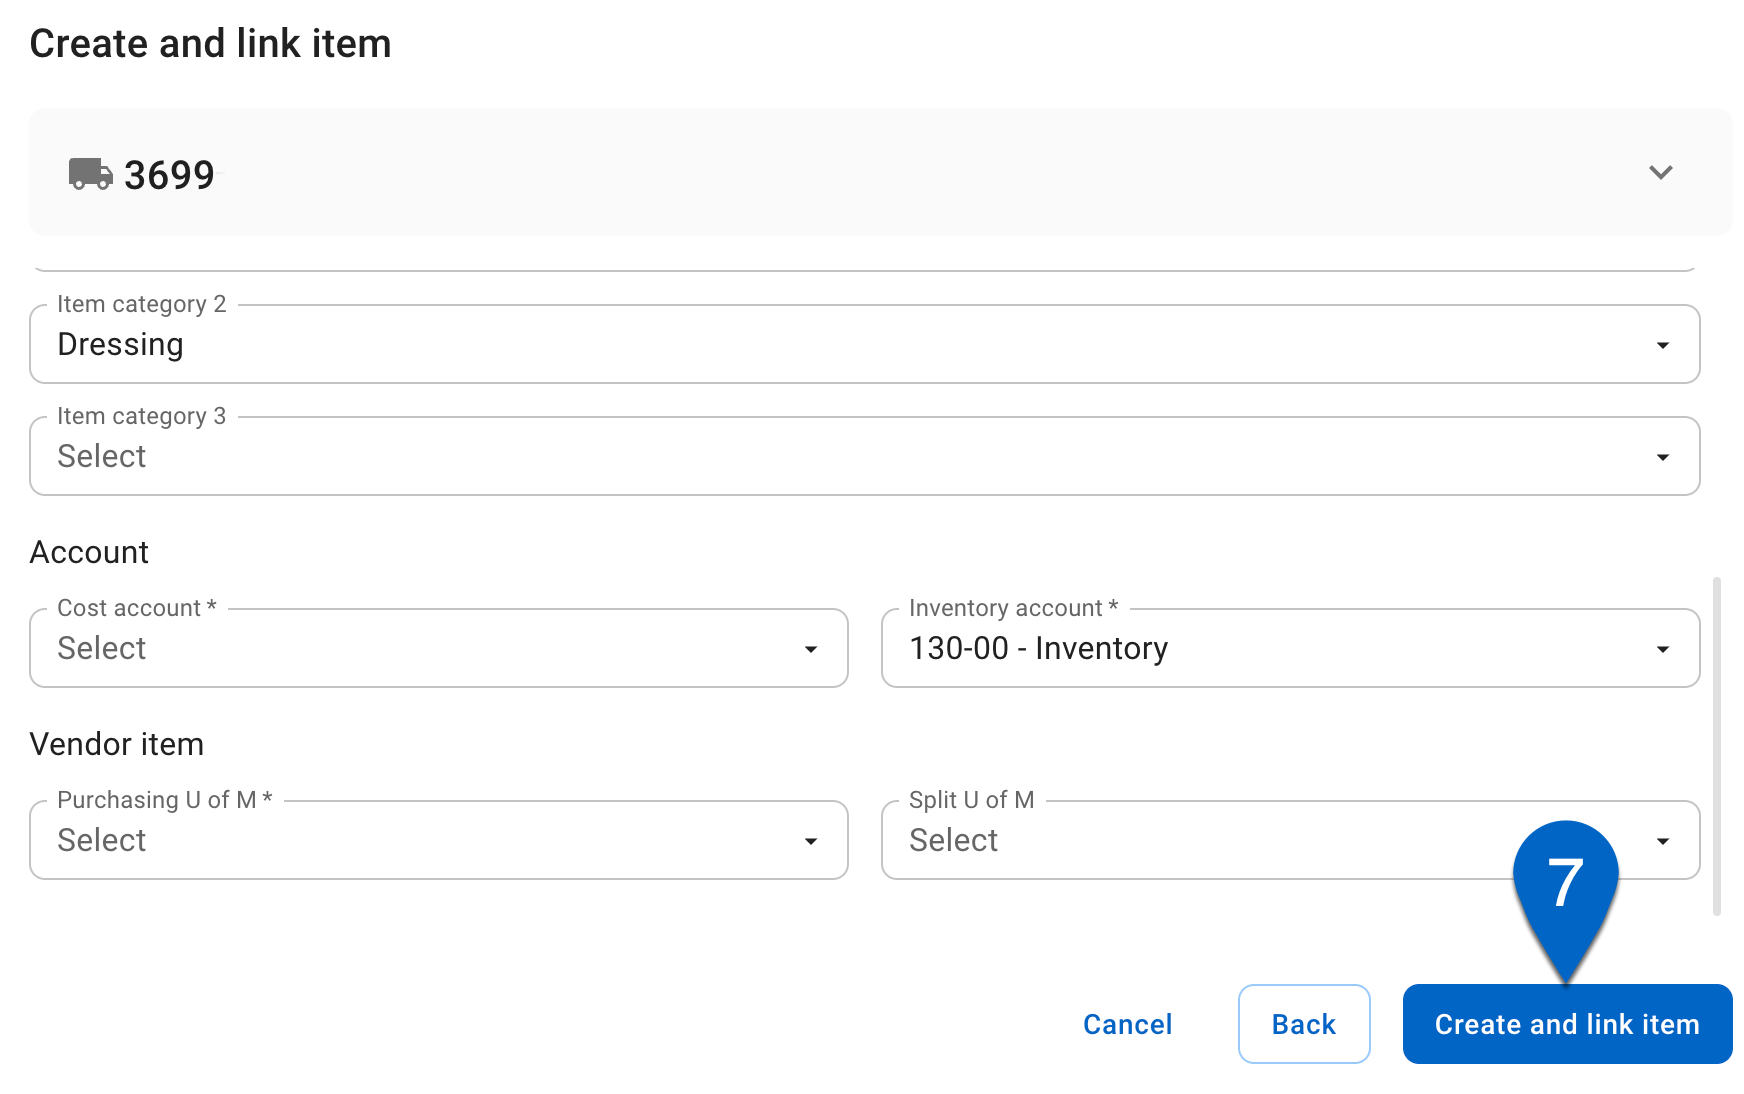
The purchased item will be added to the purchased items list, and the item will be linked. The fields on this form are the same as the purchase item counter. Read more about creating a purchased item.