If your account has moved to the new Pay Runs experience, see New Earnings Import Template.
The Earnings Import template is used to import earnings to pay runs in Workforce Payroll. When the Earnings Import template is downloaded, all active employees and all valid earnings types are included in the blank template.
Download
The Earnings Import template is downloaded from within the Add Import wizard.
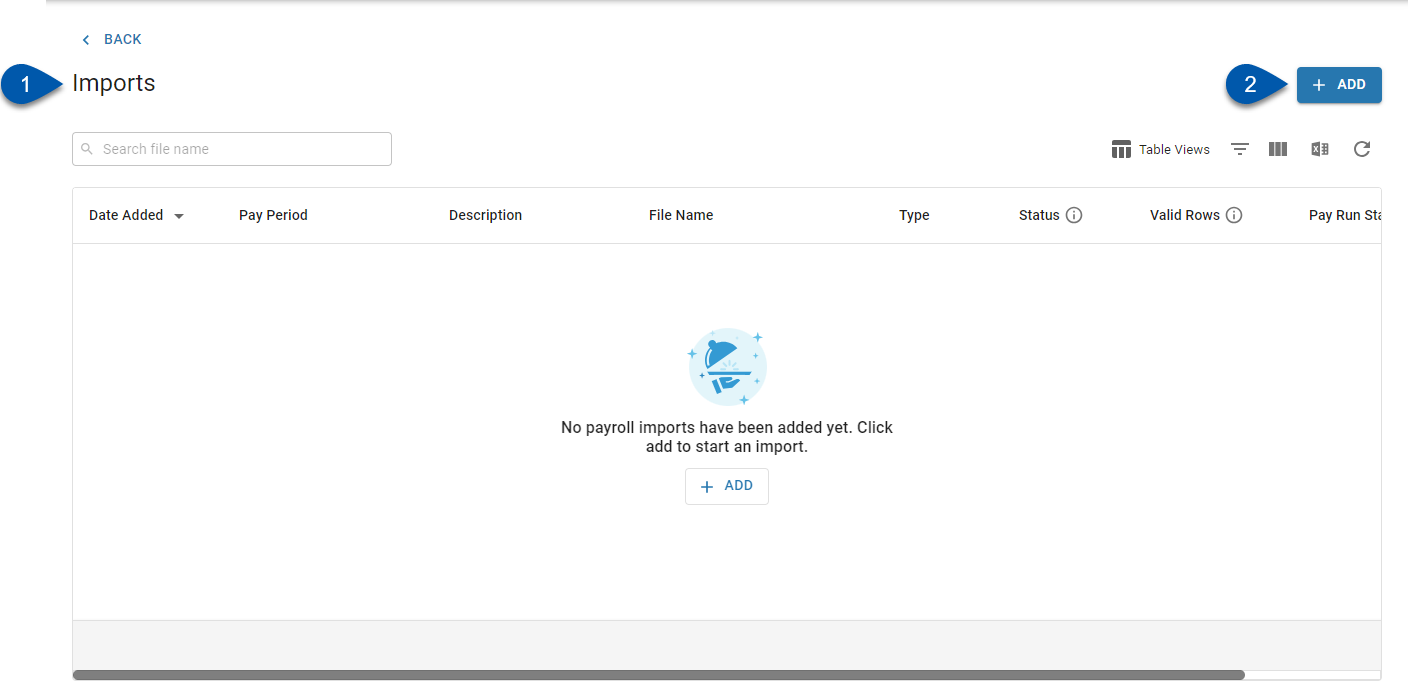
Navigate to the Imports page.
Click +Add to open the Add Import wizard.
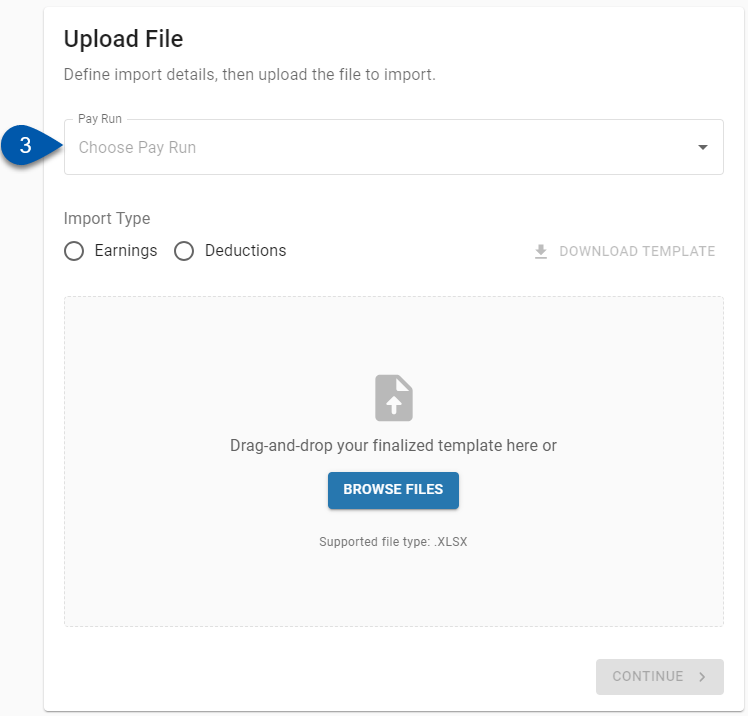
Select the desired pay run.
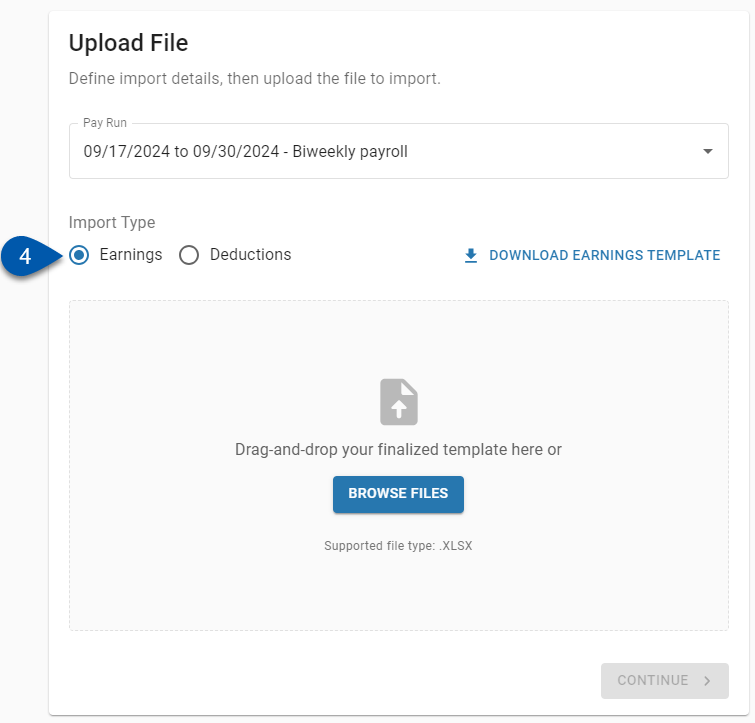
Select Earnings.
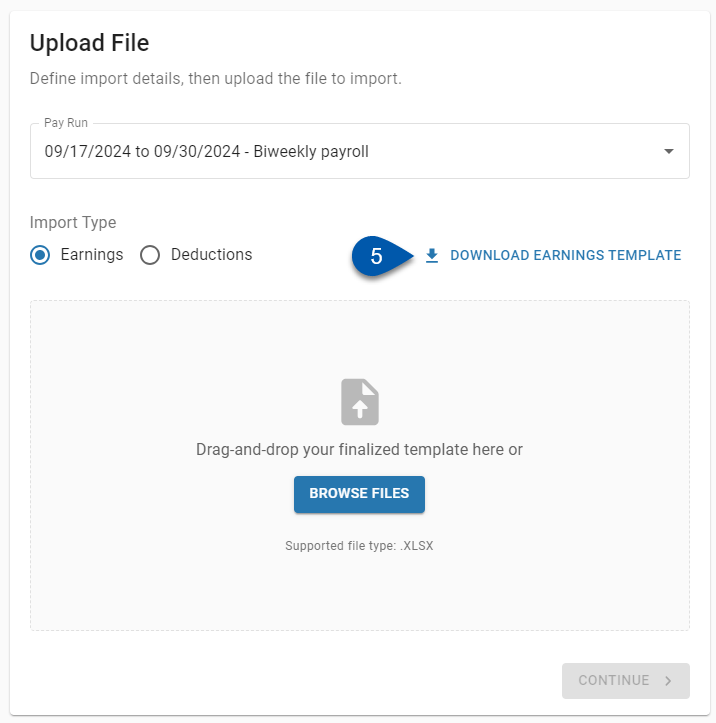
Click Download Earnings Template.
Template Columns
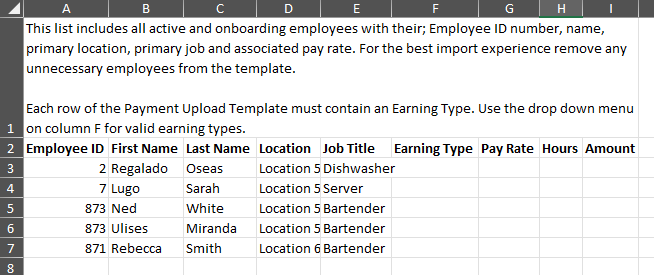
Column | Description | |
|---|---|---|
A | Employee ID | Unique numerical ID for the employee as it appears on their employee record. |
B | First Name | Employee’s first name as it appears on their employee record. |
C | Last Name | Employee’s last name as it appears on their employee record. |
D | Location | Location associated with the employee’s job.
|
E | Job Title | Job associated with the imported earnings.
|
F | Earning Type | Type of earning to be added to the employee’s payment. |
G | Pay Rate | Pay rate for the employee associated with the listed job and location.
|
H | Hours | Hours for the employee associated with the earning.
|
I | Amount | Amount of the earning being imported.
This field is required. |
Filling Out The Template
Follow these steps to properly fill out the Earnings Import template.
Enter Earning Details Per Employee
1) Locate the line for the desired employee.
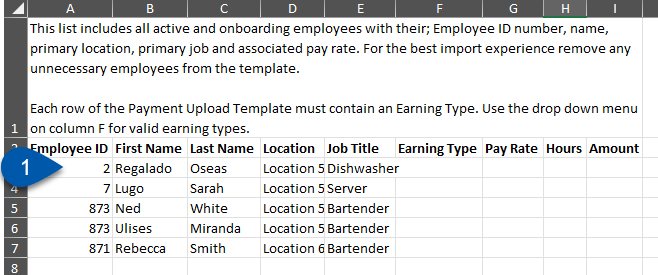
2) Do not edit columns A - C.
The Employee ID, First Name, and Last Name must match the employee’s employee record. Errors in the employee’s name and associated employee ID can be updated after import, if needed.
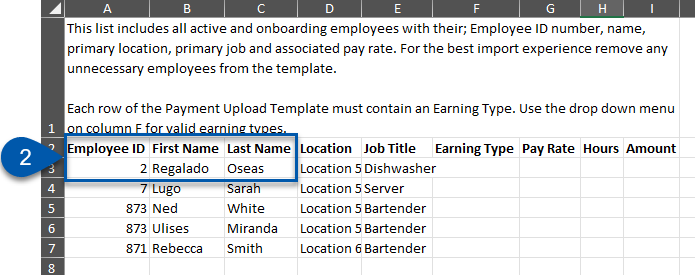
3) Confirm the location and job associated with the employee’s earning.
Locations names must match the location name as it appears on the location record and be associated with the entered job.
Job Titles and must match the job name as it appears on the employee’s employee record.
Locations must match the location name as it appears on the employee’s employee record.
Errors can be corrected after upload if needed.
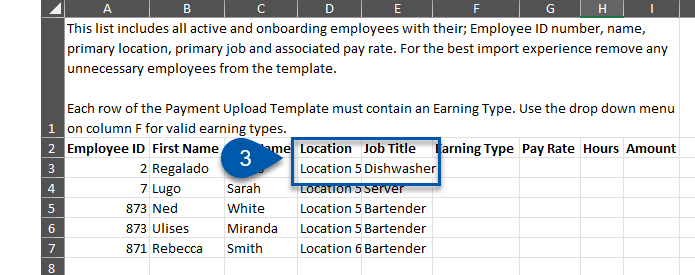
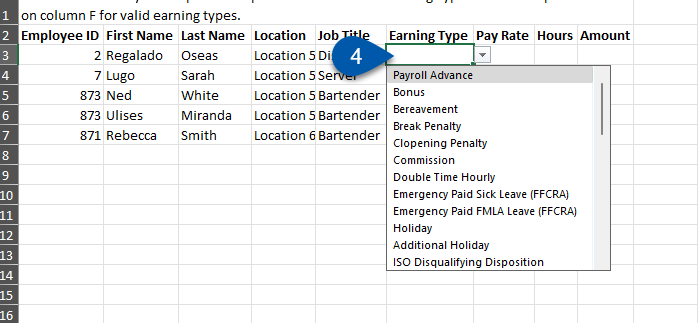
4) Select an earning type from the drop-down menu.
Only earning types present in the drop-down menu can be imported.
Errors can be corrected after upload if needed.
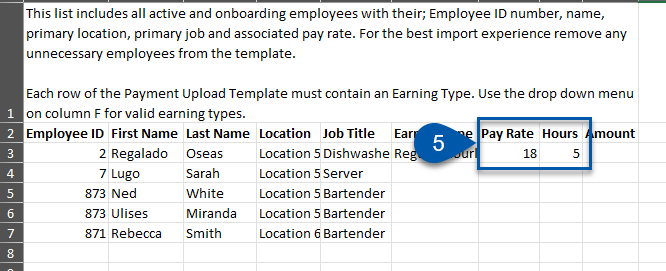
5) For hours-based earnings, enter the pay rate and hours associated with the earning.
The system will calculate and update the final import amount based on the pay rate and hours entered.
Errors can be corrected after upload if needed.
6) Enter the amount to be imported.
For amount-based earnings, the system will use this amount as the import amount and it can be corrected after upload if needed.
For hours-based earnings, the system will calculate the amount based on the pay rate and hours and indicate if the entered amount does not match the system calculation.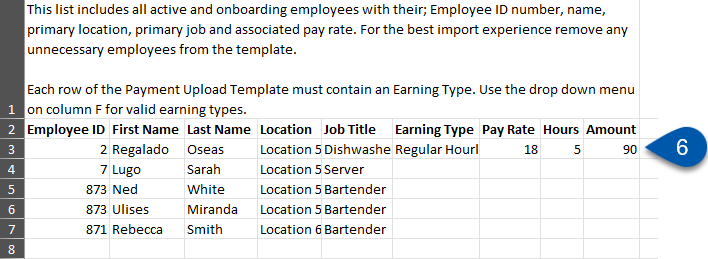
Add Additional Employees
Follow these steps to add separated employees or other employees not present on the import template:
1) Confirm that the employee has been onboarded to payroll.
Only employees who have been onboarded to payroll can be included in a pay run.
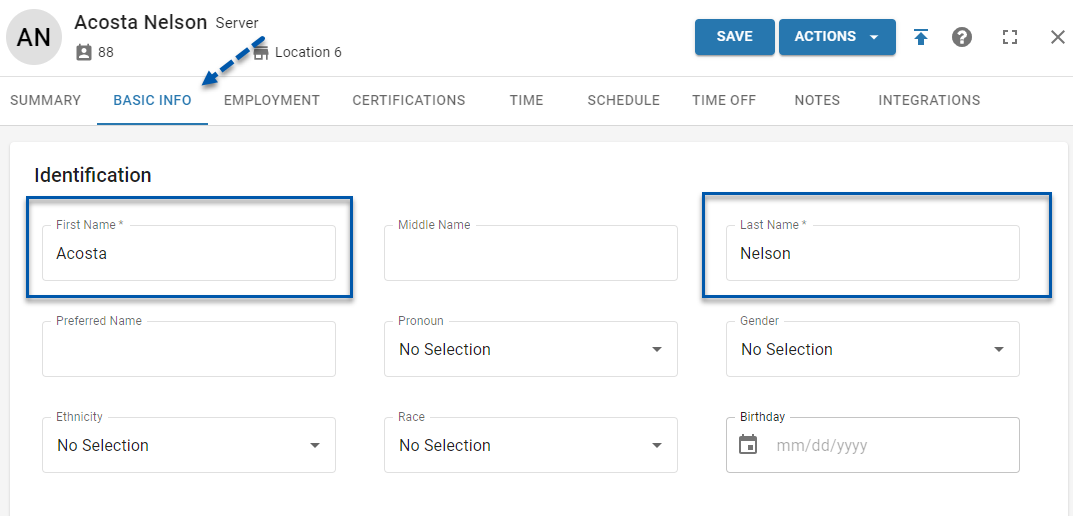
2) Note the employee’s Employee ID, First Name, Last Name, Job Title and Location as they appear on their employee record.
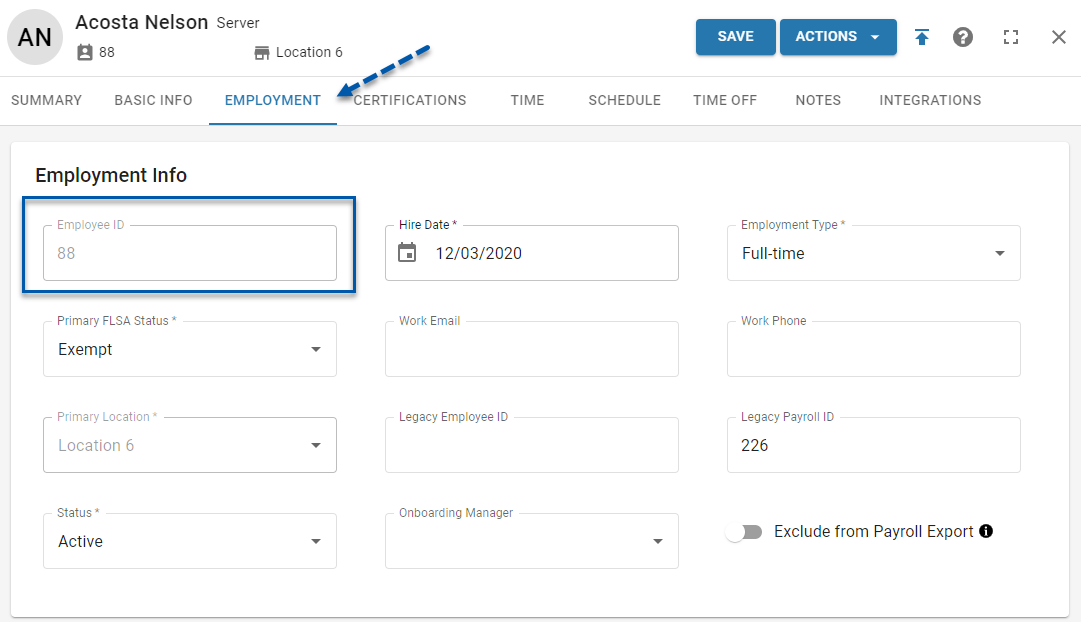
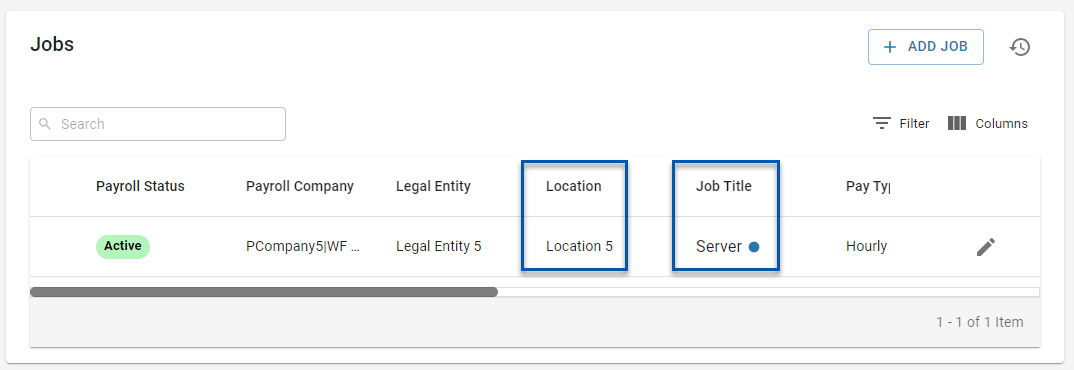
3) Locate a blank row on the import template.
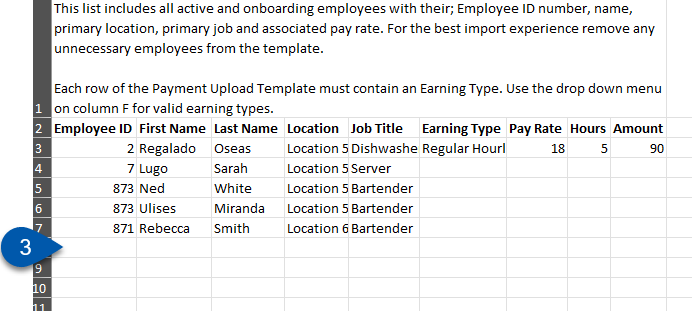
4) Enter the employee’s details for columns A-E into the blank row.

5) Enter the earning details.

Add Multiple Earning Types for a Single Employee
Follow these steps to add additional earning types for a single employee.
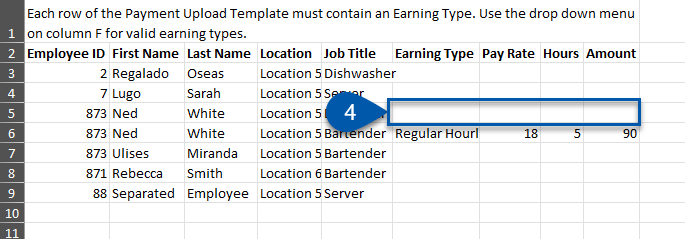
1) Locate the line for the desired employee.

2) Insert a blank row above or below the desired employee.
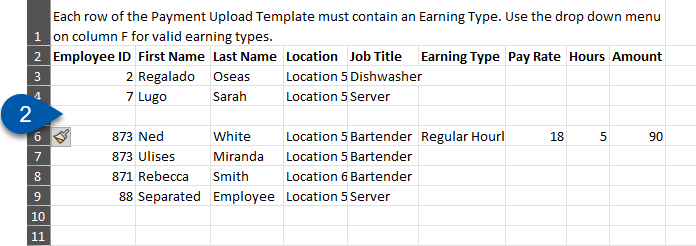
3) Copy the details from columns A-E from the employee’s existing row into the blank row.

4) Enter the earning details.
Remove Unnecessary Employees
All rows in the Earnings Import template will be checked for validity when it is uploaded. Removing unnecessary employees prior to import reduces rows in the review step of the import process.