If your account has moved to the new Pay Runs experience, see New Review Pay Run Import Errors.
After an Earnings Import template or Deductions Import template has been imported through the Add Import wizard, the import must be reviewed and completed before the earnings/deductions are imported to the pay run.
Earnings imports are reviewed on the Earnings Import Details page.
Deductions imports are reviewed on the Deductions Import Details page.
Only rows without errors will be imported. Earnings and deductions cannot be imported to pay runs that have already been approved.
Rows Without Errors
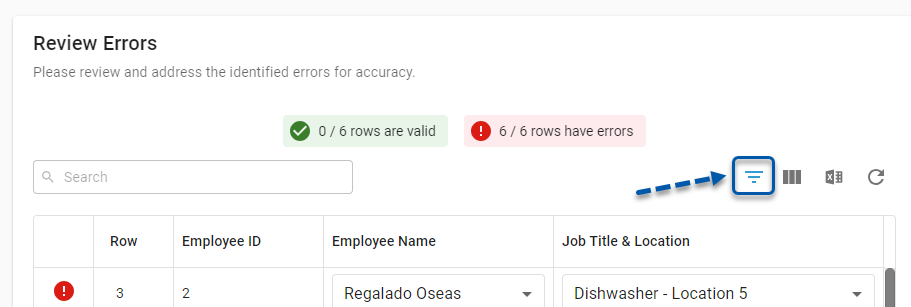
By default, when an import is incomplete, valid rows are hidden. To view all rows of the import, remove or update the grid filter.
Security
Users must have the following permission to edit import errors:
Payroll → Workforce Payroll → Payments → Edit Payments
These permissions can be added to custom user roles or individual users. The Permission Access report can be used to determine which user roles or users already have these permissions assigned. For more information, see User Setup and Security.
Review Earning Import Errors
Follow these steps to review earning import errors:
1) Navigate to the desired Earnings Import Details page.
The Earnings Import Details page is displayed as part of the Add Import wizard and can be accessed from the Imports page after the Add Import wizard is closed.
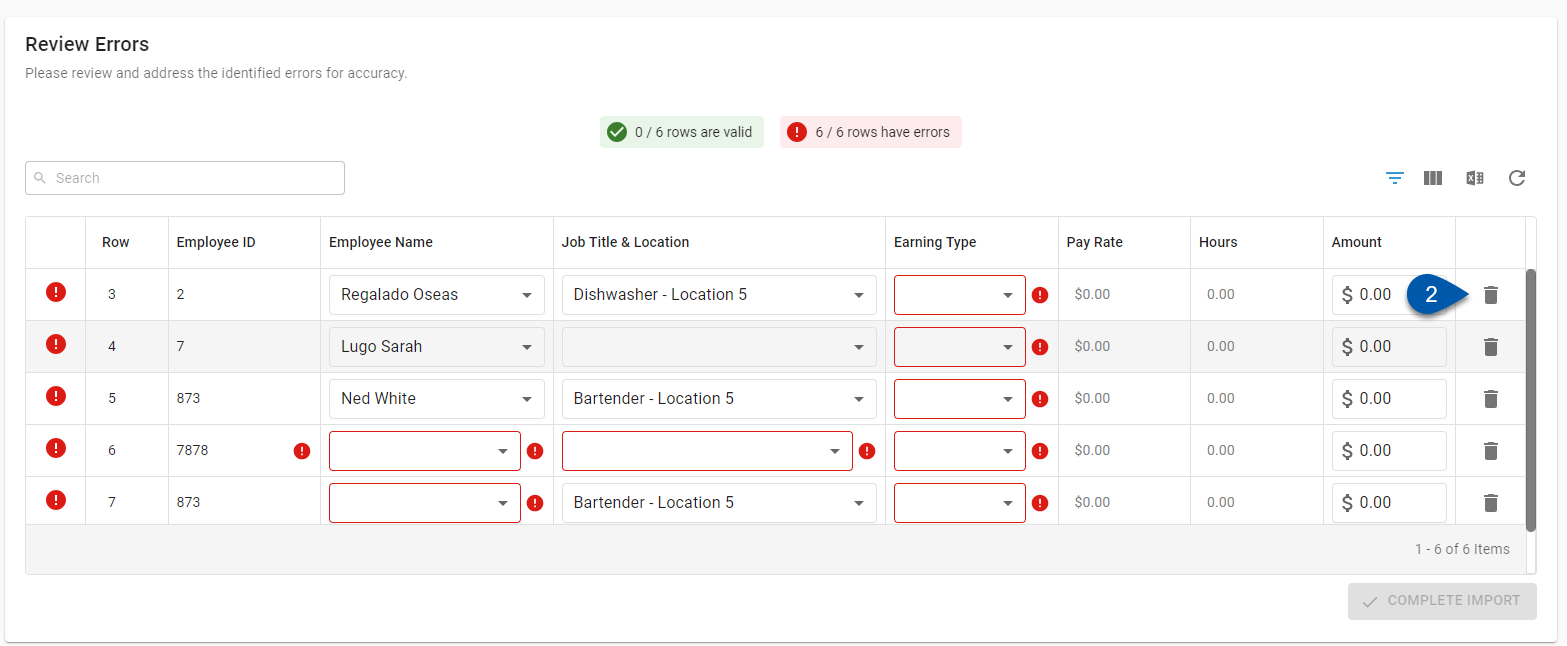
2) Delete unneeded rows.
If an employee was listed on the Earnings Import template but did not have an earning associated with them, the row will be listed as an error. If no earnings need to be imported for the employee, delete the row by clicking the trashcan button.
Deleting a row will not update the row numbers. Row numbers will always match the corresponding row number from the import template.
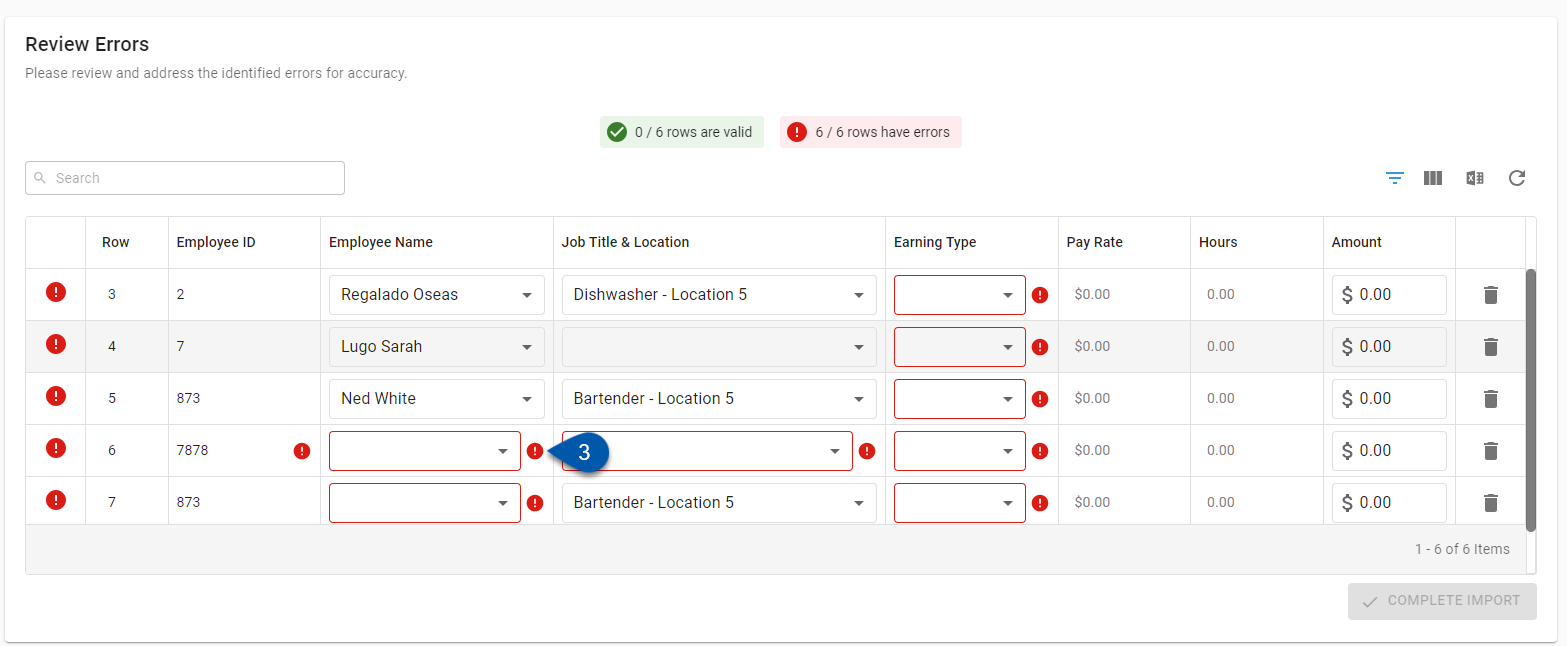
3) Correct employee name and employee ID errors.
Errors in the employee name or employee ID are corrected by selecting the correct employee from the Employee Name drop-down menu:
Selecting an employee will automatically update the Employee ID field.
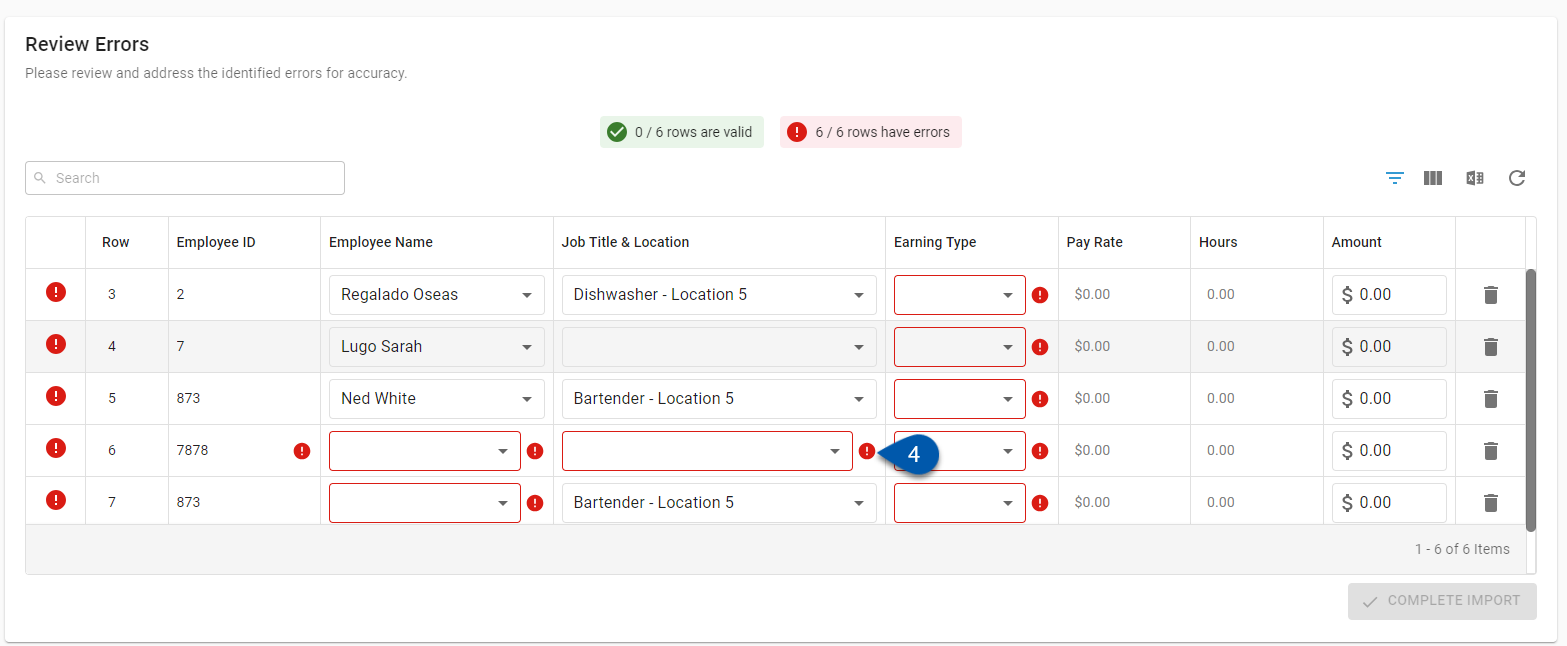
4) Correct job and location errors.
Jobs and locations are updated by selecting the correct value from the Job Title & Location drop-down menu.
Only jobs on the employee’s employee record can be selected. Jobs are location-specific.
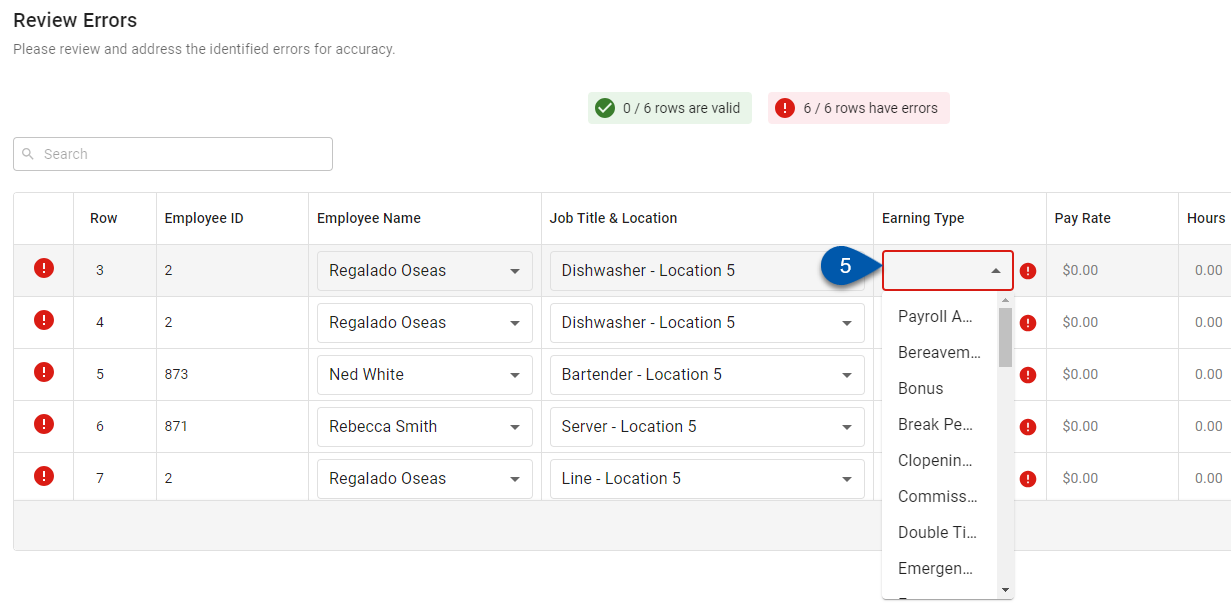
5) Correct earning type errors.
Earning types are updated by selecting the correct value from the Earning Type drop-down menu.
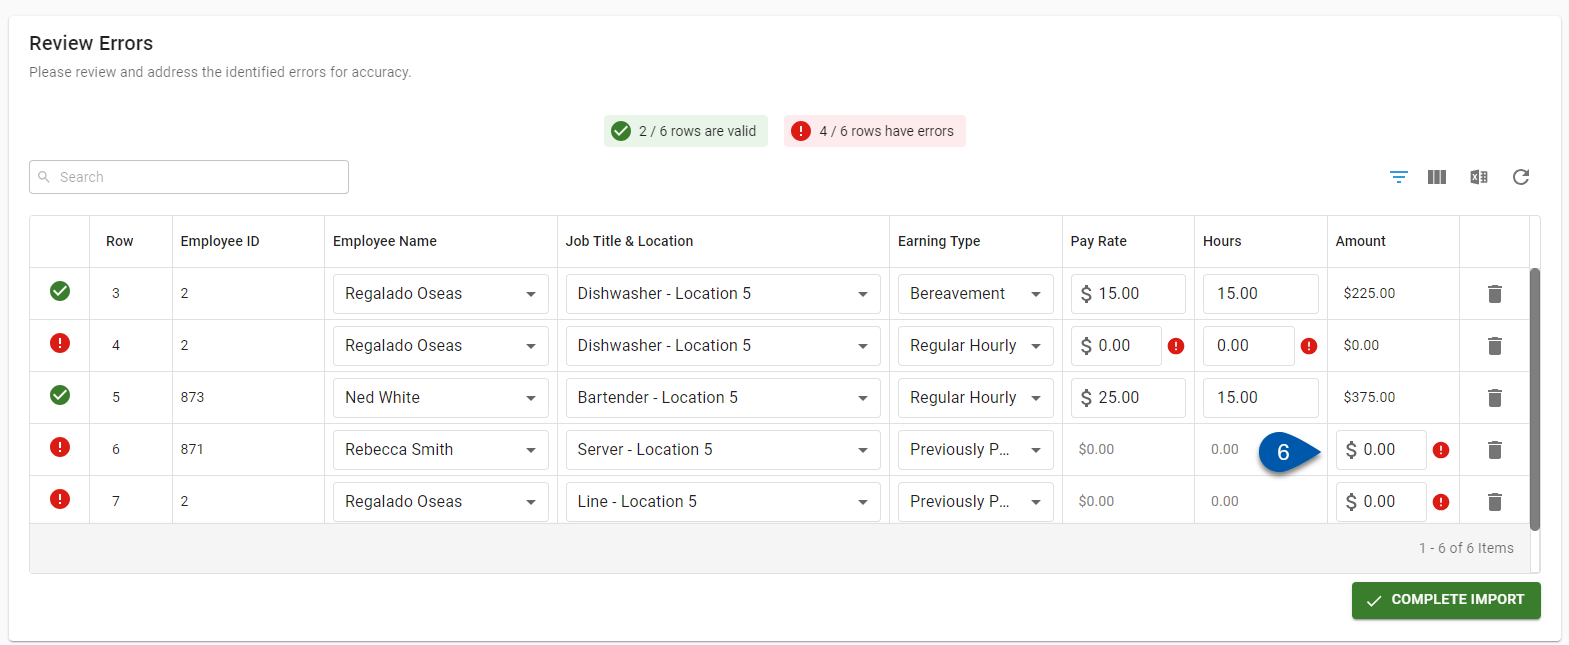
6) Correct pay rate, hours, and amount errors.
Hours-Based Earnings
Corrections for hours-based earnings are entered into the Pay Rate and Hours columns. The Amount column is calculated by the system and cannot be directly edited.
The pay rate for hours-based earnings cannot be $0.00, except when the earning type is ‘Unpaid Leave’.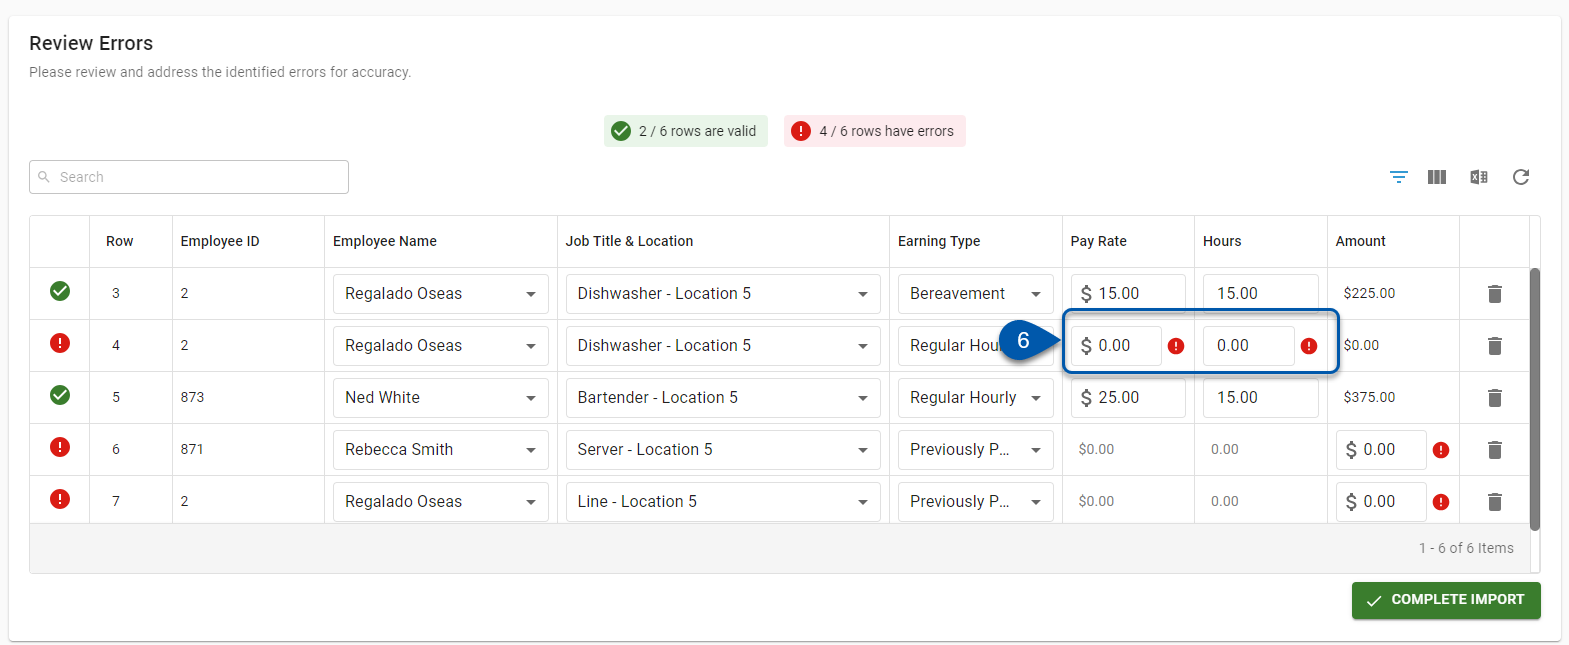
If the amount entered in the import file did not match the calculation of (Pay Rate * Hours), a warning icon is displayed to indicate that the amount for the row was updated by the system. This is the amount that will be imported.
Cost-Based Earnings
Corrections for cost-based earnings are entered into the Amount column. The Pay Rate and Hours columns cannot be edited.
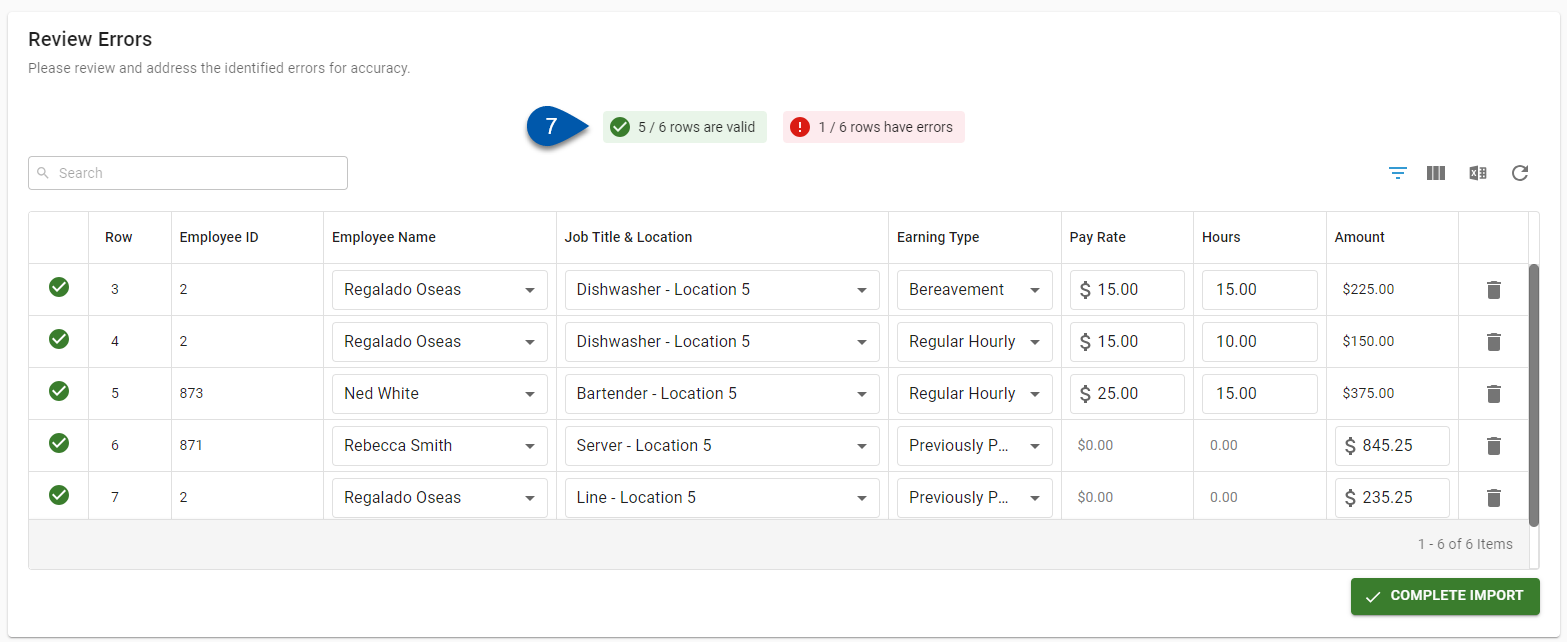
7) Confirm that all rows that should be imported have been fixed.
The import can only be imported once. Confirm that all rows that should be imported have been fixed before importing.
8) Click Complete Import to import rows without errors to the pay run.
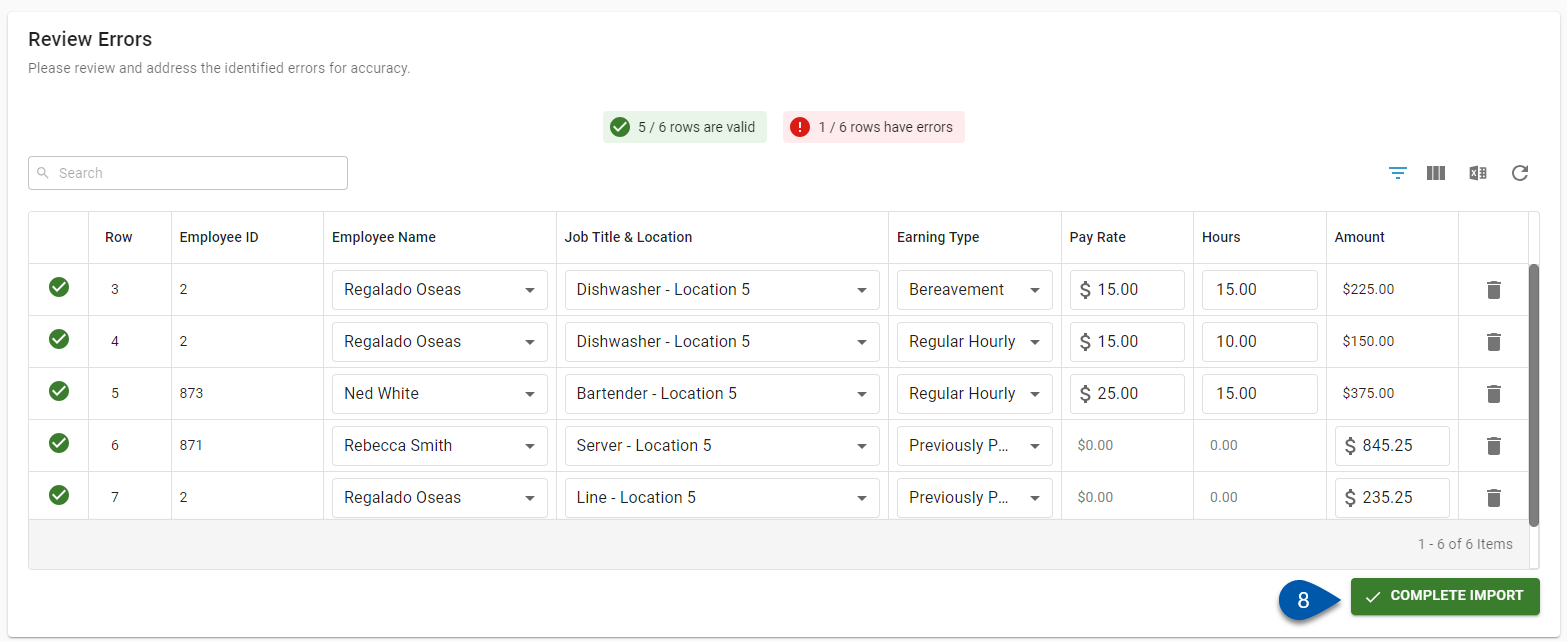
The Complete Import button is disabled when the associated pay run has already been approved.
Review Deduction Import Errors
1) Navigate to the desired Deductions Import Details page.
The Deductions Import Details page is displayed as part of the Add Import wizard and can be accessed from the Imports page after the Add Import wizard is closed.
2) Delete unneeded rows.
If an employee was listed on the Deductions Import template but did not have a deduction associated with them, the row will be listed as an error. If no deductions need to be imported for the employee, delete the row by clicking the trashcan button. 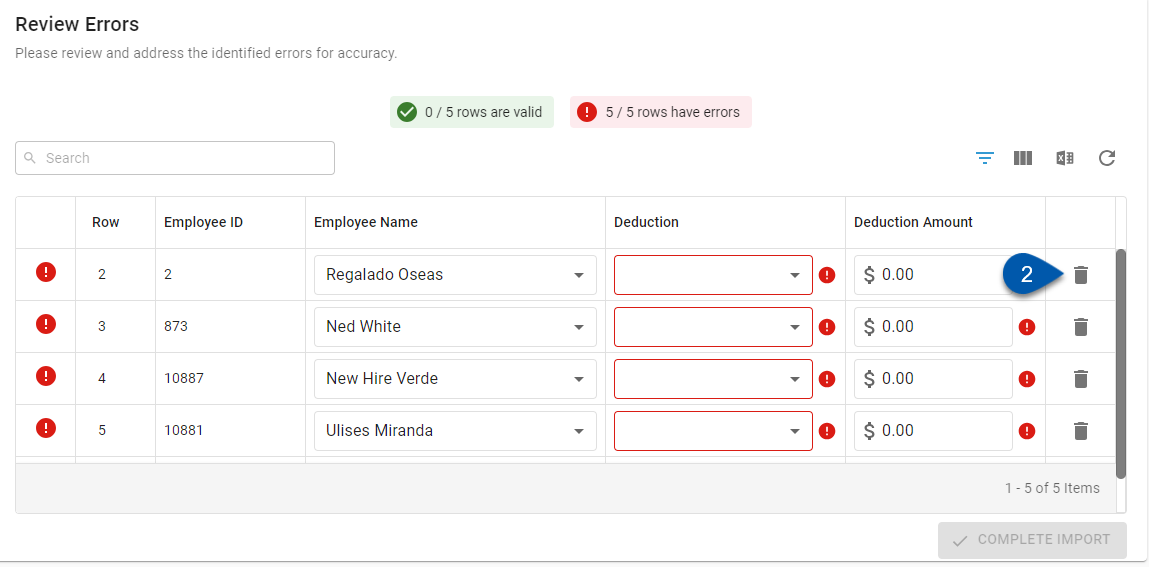
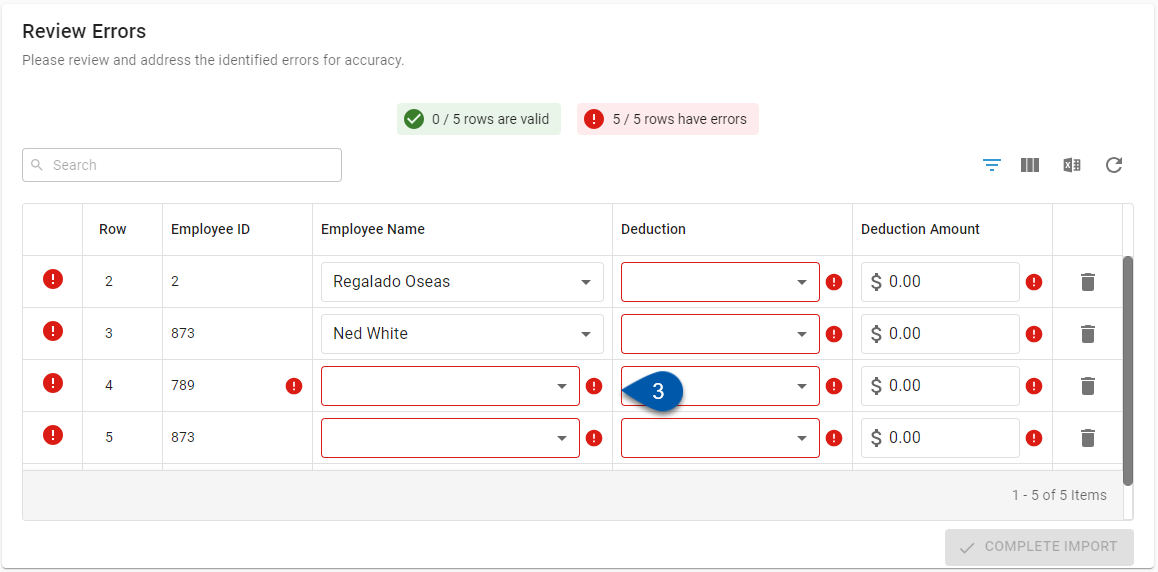
3) Correct employee name and employee ID errors.
Errors in the employee name or employee ID are corrected by selecting the correct value from the Employee Name drop-down menu:
Selecting an employee will automatically update the Employee ID field.
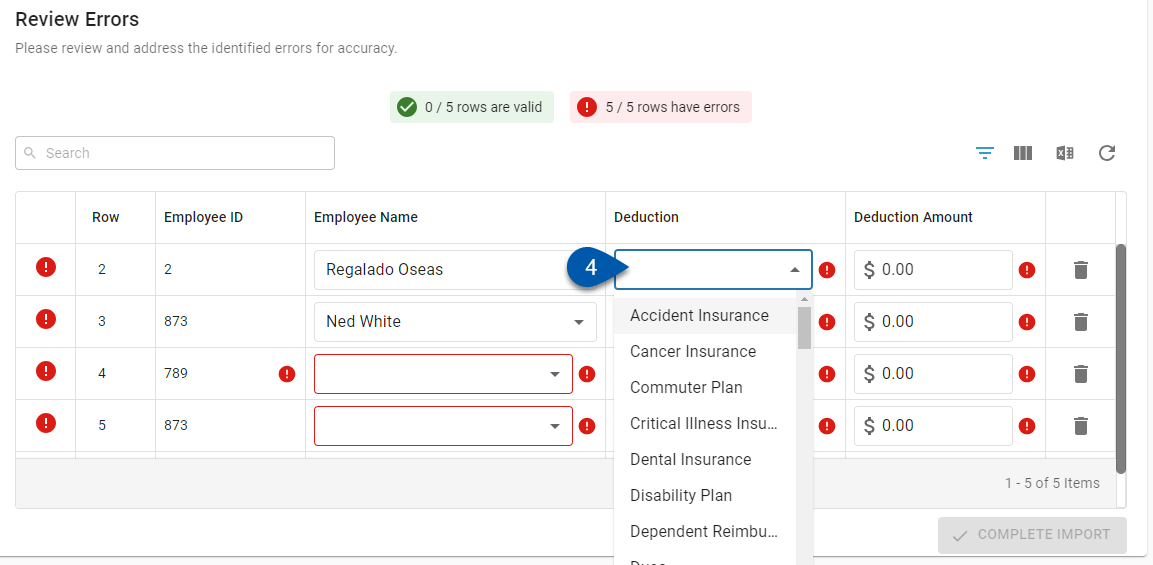
4) Correct deduction type errors.
Deduction types are updated by selecting the correct value from the Deduction drop-down menu.
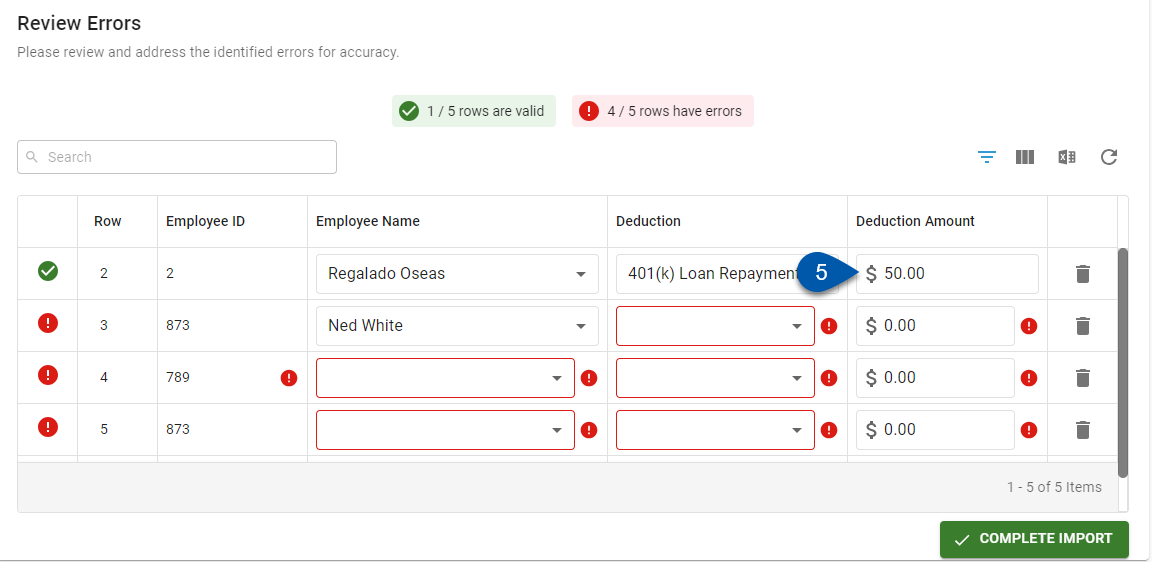
5) Correct deduction amount errors.
Amounts are updated by entering the correct value in the Deduction Amount field.
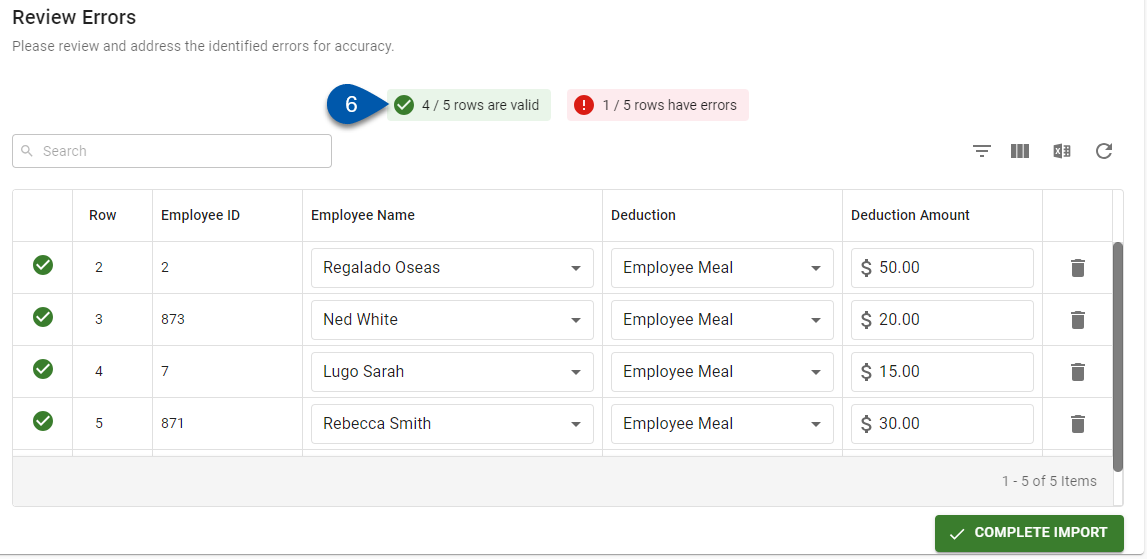
6) Confirm that all rows that should be imported have been fixed.
The import can only be imported once. Confirm that all rows that should be imported have been fixed before importing.
7) Click Complete Import to import rows without errors to the pay run.
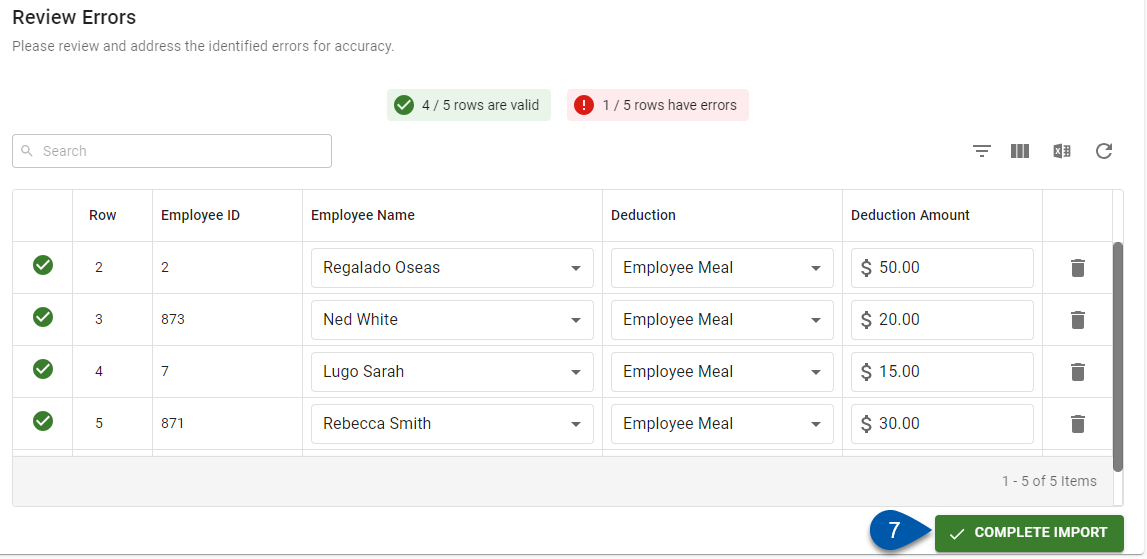
The Complete Import button is disabled when the associated pay run has already been approved.
