.png)
The F9 Segment Descriptions report in R365 is designed for F9 customers looking to seamlessly transfer data into F9 for further financial reporting. This report provides comprehensive details, including General Ledger (GL) account information, legal entity data, and location specifics. It is formatted to meet the requirements for direct import into F9, eliminating the need for setting specific report parameters. By delivering all necessary information in a structured format, the F9 Segment Descriptions report streamlines the data transfer process, ensuring accuracy and efficiency in financial analysis and reporting, empowering R365 users to leverage F9's robust financial reporting capabilities and make informed business decisions based on precise financial data.
Navigation
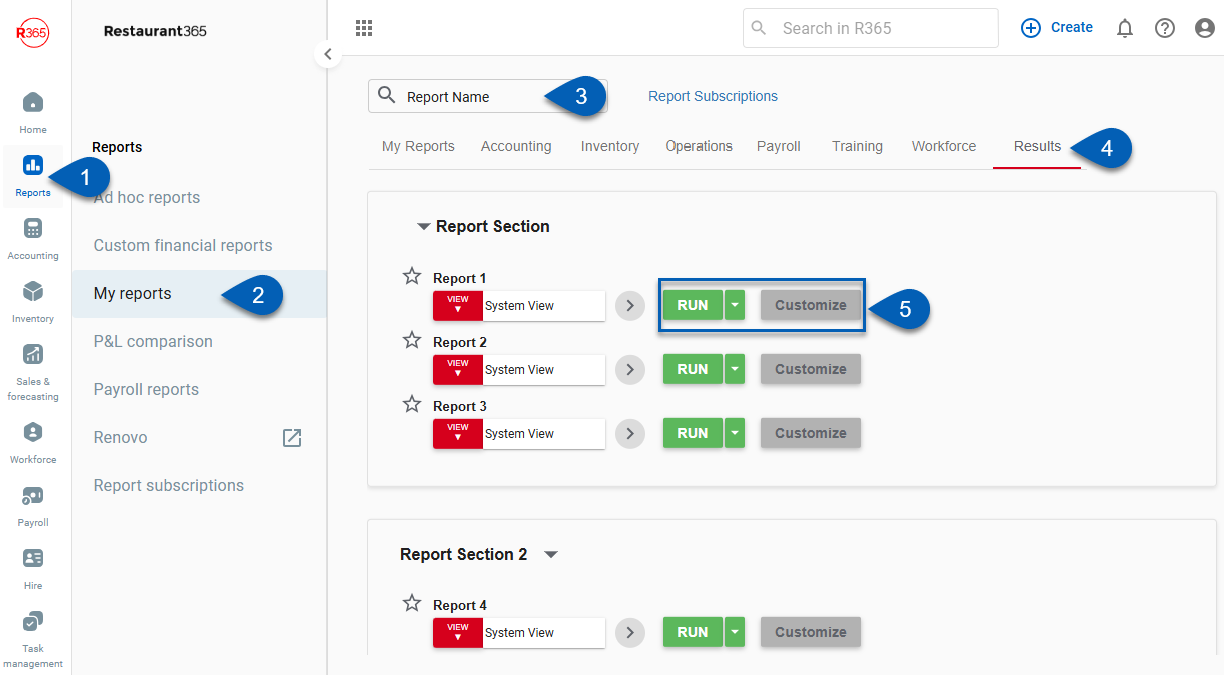
The My Reports search bar can be used to search R365's entire catalog of reports.
- Open the Reports app.
- Navigate to My Reports.
- Enter all or part of the report name in the search bar.
- The Results tab will open with the list of search results.
- From beneath the report name, click Run to run the report with the selected report view.
-OR-
Click Customize to adjust the report parameters and run the report.

Report Parameters
The report has no customizable parameters.
Report Columns
.png)
Column | Description |
|---|---|
Segment Number | Code used to identify the type of individual account.
|
Segment Value | Segment code used for each account. This is the GL account number used in R365. |
Segment Description | Description associated with the segment value. This often includes the name of the GL account. |
Email, Export, or Print the Report
This report can be emailed, exported, or printed in custom formatting directly from the reporting window. Learn more about how to send, export, or print this report.
