If your account has moved to the new Pay Runs experience, see New Imports Page.
This article reviews the Payment Upload Template, which is used to import hours and earnings to Pay Runs within Workforce.
Downloading the Payment Upload Template
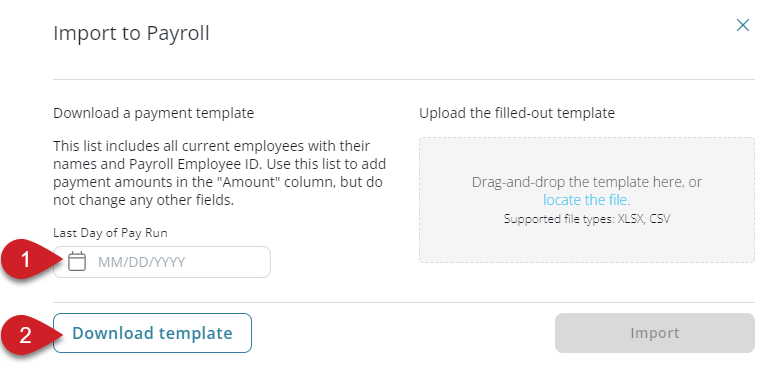
To download the Payment Upload Template, click 'Import' on the Payroll Overview page.

The Import Payment tool will open.
Enter the last date of the desired Pay Run. This date will auto-populate on the downloaded template, and determines which Pay Run the entries are imported to.
Import entries are imported to the pay run for the date associated with them.
Click 'Download template' to download the Payment Upload Template as a .xlsx file.
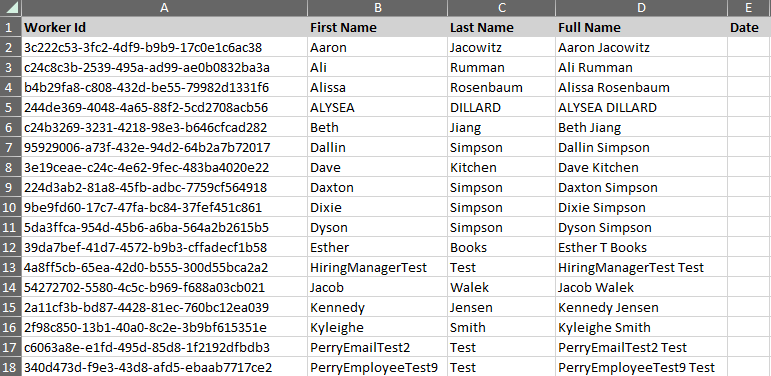
The downloaded Payment Upload Template will already be populated with Employee details.
Payment Upload Template
Template Prep
In order for the upload template to successfully import, certain rows must be deleted:
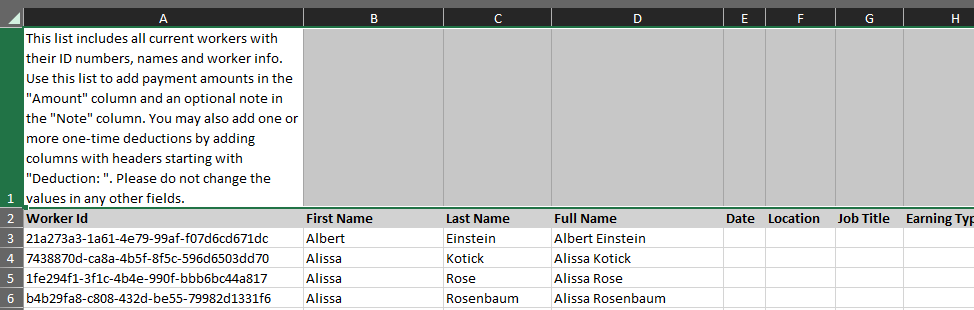
Remove Row 1
The first row of the downloaded template contains instructions for the template. This row must be removed in order for the template to successfully import.
Remove Unneeded Employees
Each row of the Payment Upload Template must contain an Earning Type (column H). Any Employees on the downloaded template that do not have earnings to upload must be removed. Employees with blank earning information will cause the import to fail.

Importing Multiple Earning Types For a Single Employee
To import multiple Earning Types for an Employee, add additional rows with the same information for columns A-E
 Template Columns
The Payment Upload Template contains the following columns:
Column Title | Description | Notes | |
|---|---|---|---|
A | Worker ID | Unique identifier for the Employee | Required |
B | First Name | Employee's first name | |
C | Last Name | Employee's last name | |
D | Full Name | Employee's full name | |
E | Date | Date associated with the Earning | Required |
F | Location | Location associated with the Employee's earnings | Required |
G | Job Title | Job associated with the Employee's earnings | Required |
H | Earning Type | Earning Type for the Payment | Required
|
I | Pay Rate | Pay rate associated with hours | Used for reporting the associated pay rate on paystubs.
|
J | Hours | Hours worked | Used for reporting the associated hours on paystubs.
|
K | Amount | Amount of Earning | Required |
L | Note | Comments regarding the Earning | |
M | Deduction: DEDUCTION_NAME | Columns M-Z are reserved for One-Time Deductions | Learn more about importing One-Time Deductions here. |
Uploading the Payment Upload Template
Once the Payment Upload Template has been filled out and saved as either a .xlsx or .csv file, it can be uploaded to the Pay Run.
From the Payroll Overview page, click the 'Import' button.
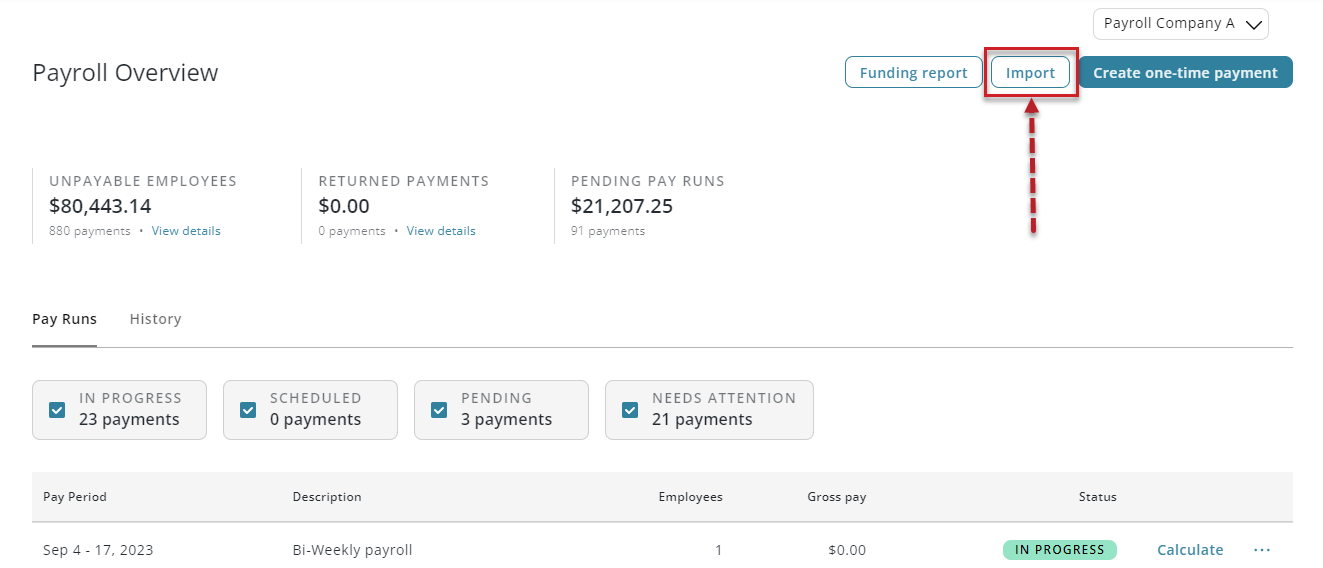
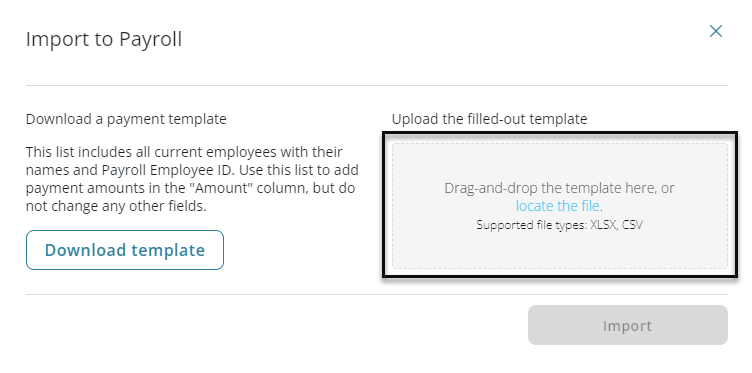
The Payment Import tool will open. Either drag and drop the completed Payment Upload Template into the upload area or click 'locate the file' to browse for the file.
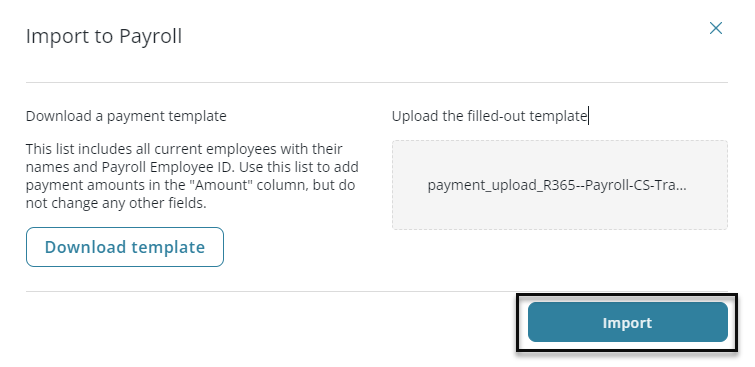
Click 'Import' to import the selected Payment Upload Template
Import Errors
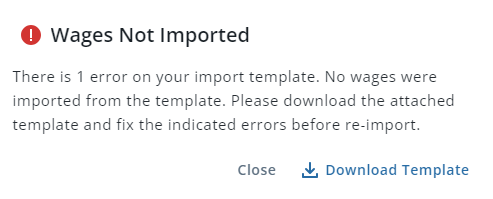
When a Payment Upload Template is imported, only the details for rows without errors will be imported. If one or more rows contain missing or incorrect information, the details of that row will not import and a 'Wages Not Imported' message will be displayed indicating how many rows contained errors.
To review and correct rows with errors, download the provided error file by clicking 'Download Template'.
The error file will only contain the rows that failed import. Column M will list all of the errors that were found for the associated row. If a row has more than one error, all errors will be listed, separated by commas.

After correcting the errors, the file can be re-imported. If additional errors are found, a new 'Error' file will be produced.